Tuesday, August 3, 2010

And more paint...prep that is

Some of you have seen where the primer has let go on my left booster cover, allowing the beautiful blue paint to flake off. Can't have that. No sirree Bob.

Here's what I'm trying. I've stripped the paint off the flat surfaces where the paint was already coming off. I've taped off the areas, and gotten out the little jar of Master Mask and done those areas that weren't conducive to tape. Sanded too...

Photobucket

Photobucket

Photobucket

Gonna let the Master Mask dry overnight and start some primer tomorrow.

Dome power switch

Also, something shiny to go with the new battery in R2's head:

Photobucket

When R2's head is facing forward, that toggle switch will always be in the back. It's how I'll turn on the JEDI light system in the dome.

Photobucket

The switch sticks down from above the dome base plate, with a little more than 1/4" of clearance from the top ring of the frame, and it's far enough in towards the center that it won't interfere with the dome drive wheel.

I've seen folks with the switch on the outside of the dome, and just didn't want kids finding it. This way even I have to look for it a little :)

Little stuff - paint on the undercarriage

So, at WSMI one of the other builders asked me why my bottom plate was black. I said...I dunno. It just is.
Guess I had to do something about it...Artoo had to jump up on the "droid lift" for this one.

Photobucket

Photobucket

A little primer and some white later, problem solved:

Photobucket

Photobucket

The bottom ring of the frame, now that's a different story. It'll be staying black, unless something REALLY bad happens that requires the frame to come back out.

More posts coming directly!

Thursday, July 15, 2010

Dome battery

As promised (2 weeks ago), here's pics of the newly installed dome battery setup.

All of the parts are recycled, or are extra stuff that was lying around. The straps, which I found at work, just happened to be the absolute perfect length to hold the battery in place. The plates are leftover A&A scrap from the frame/legs build (I kept all the scrap, for things just like this). The screws and nuts were extras, again from the frame build. You'll probably hate this part...the batteries (as are all my batteries) are from work as well. They have been pulled out of UPSs that failed and were destined for recycling. I grabbed 3 of them, charged them, and the first one I tried ran the lights for 36 hours, until I decided to turn them off. Artoo's drive system ran for 8 hours at the WSMI exhibit at the USSRC on 2 of those recycled batteries.

Anyway, back to the build!

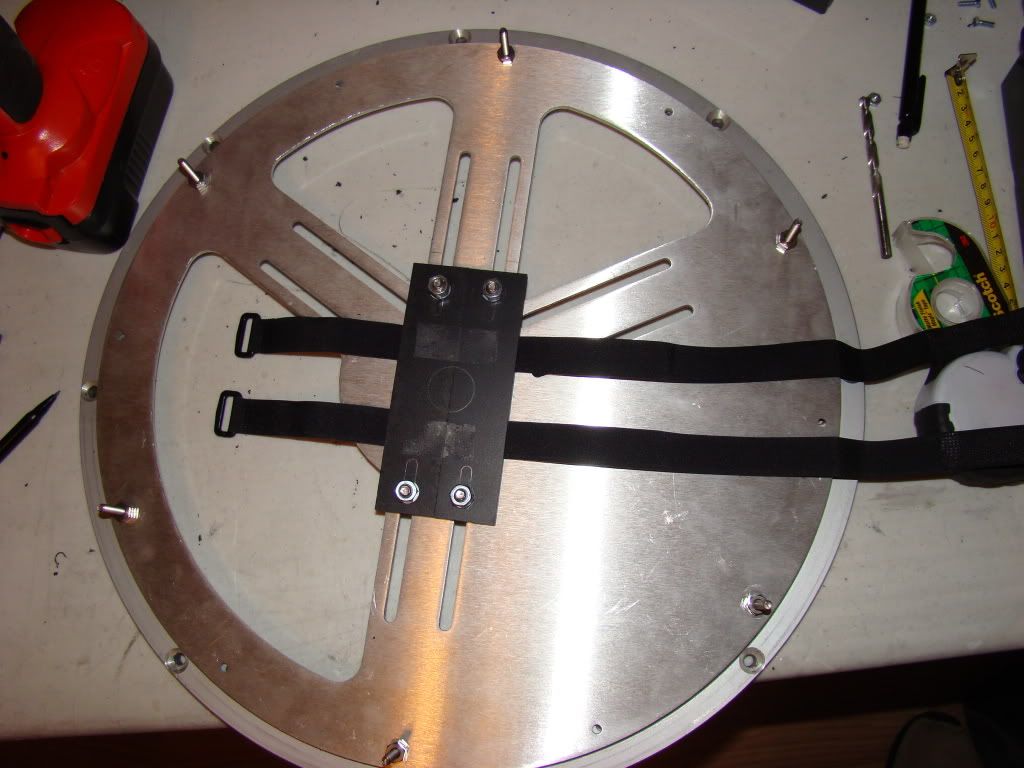
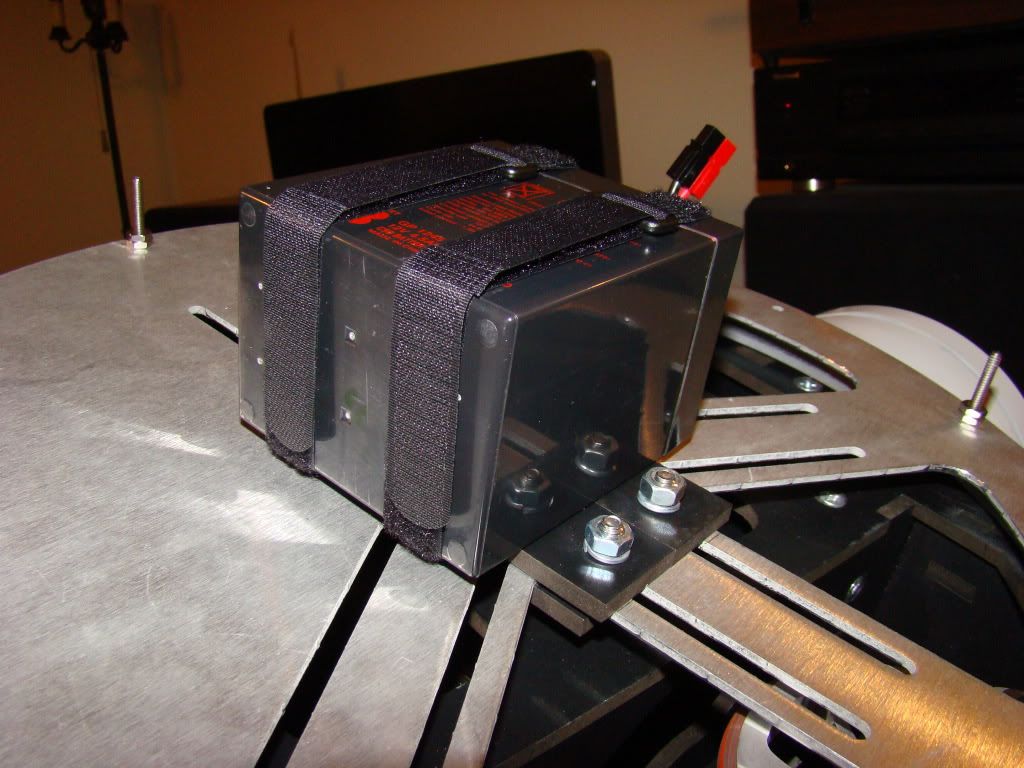
Because the slots in the JAG dome plate are further apart than the width of the battery, I had to make a plate to bolt to the JAG plate, which the straps run underneath, like so:

Photobucket

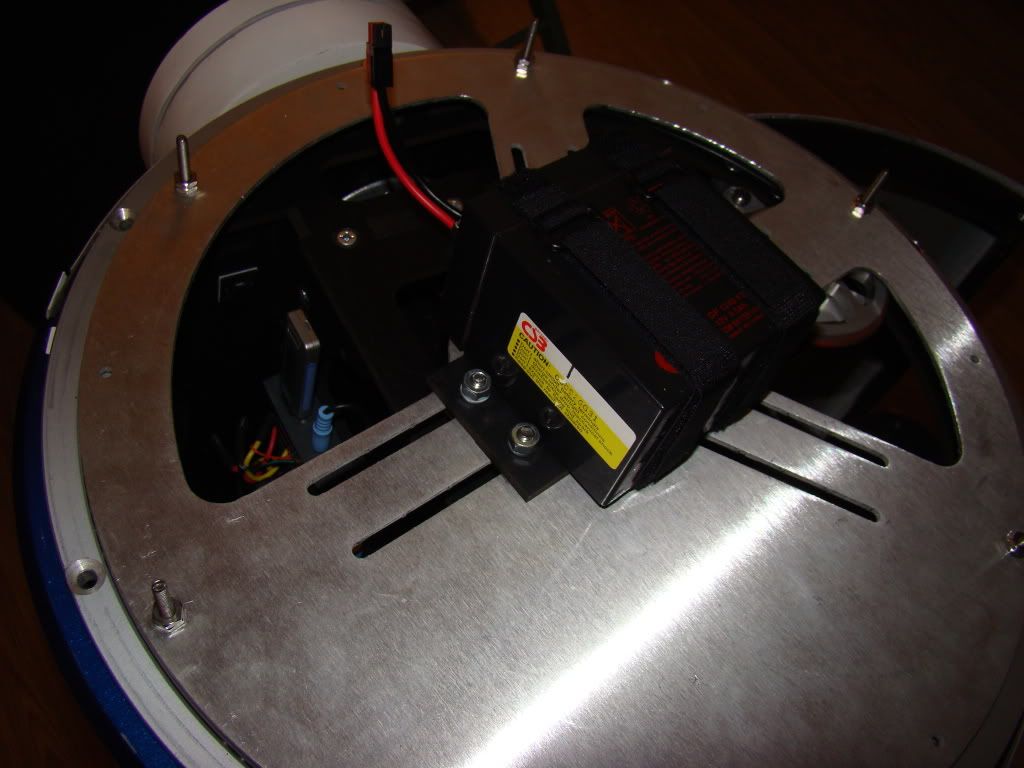
Underneath, the small plates that the larger piece bolts to has the screw heads countersunk, and is far enough in towards the center so as not to interfere with the dome drive wheel:

Photobucket
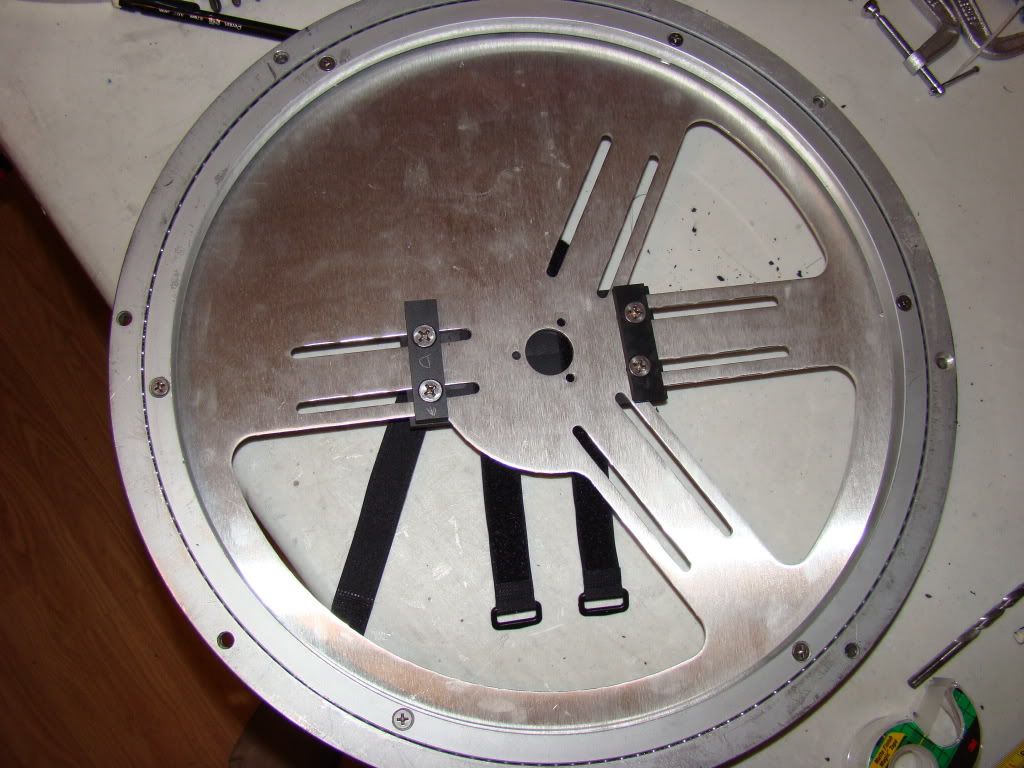
(I know it's off center in this picture, that's been corrected.)

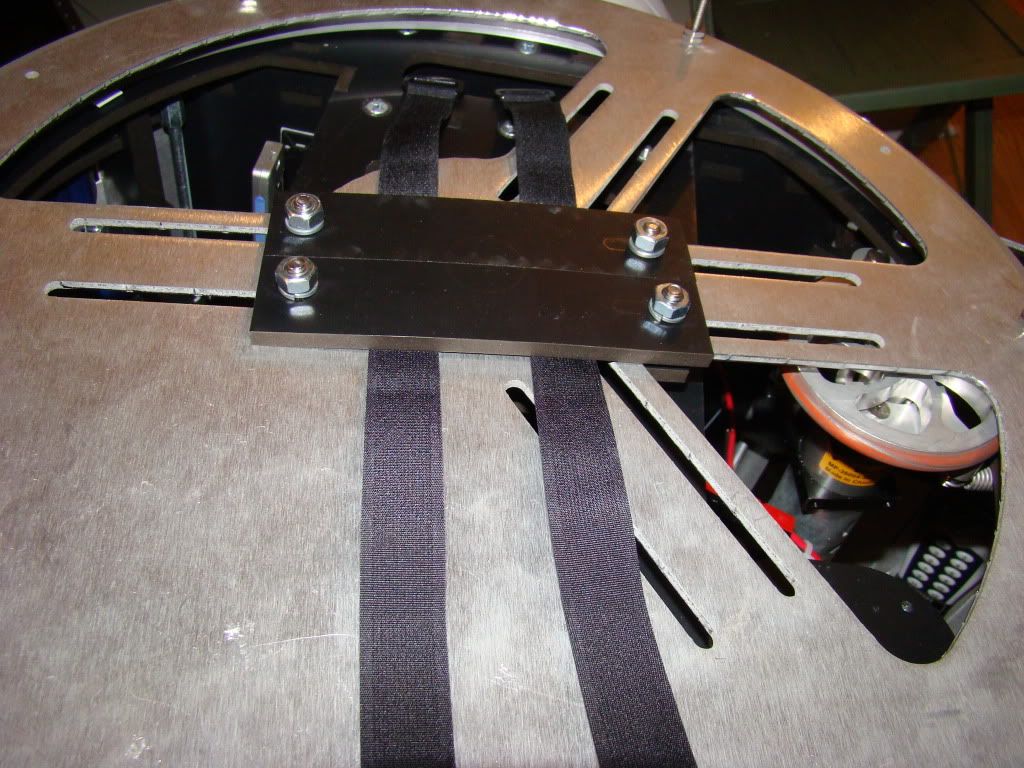
Here's a couple of shots of it installed on Artoo:

Photobucket

Photobucket

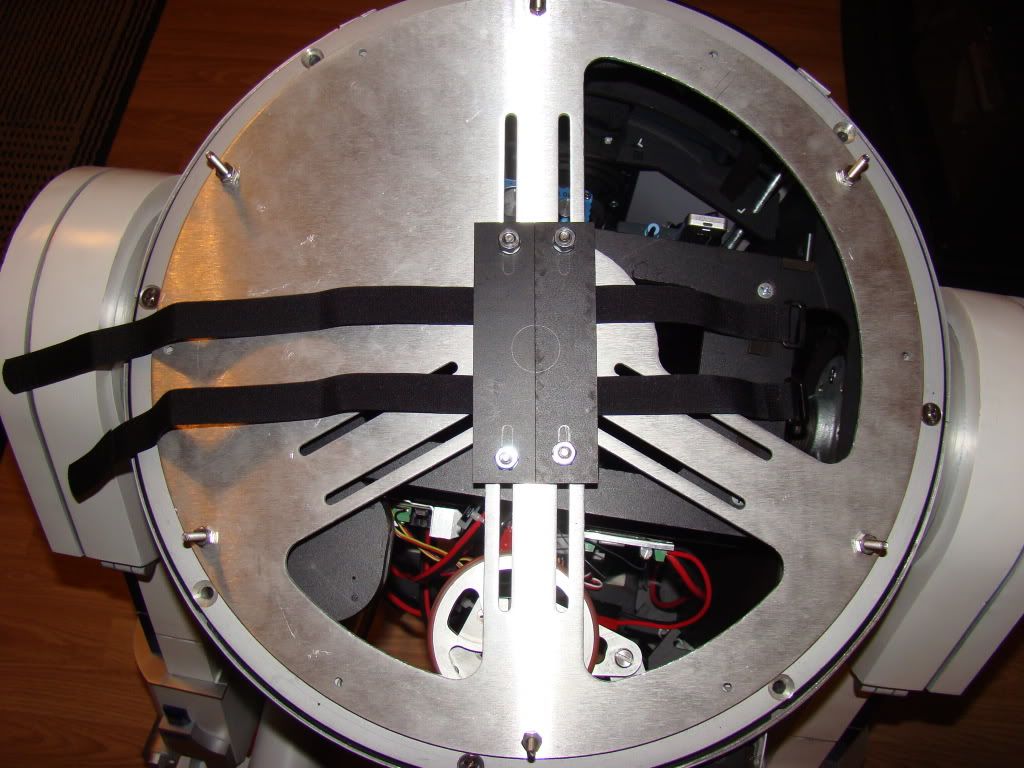
The battery is a 12v 4.5ah (or 5ah, depending on which on is installed) that velcros securely like so:

Photobucket

Photobucket

I pretty much eyeball the battery when I velcro it in place to "center" it. Since it's a smaller battery, being slightly off center shouldn't cause too much wobble when I spin the dome.

Here's what I pulled out:

Photobucket

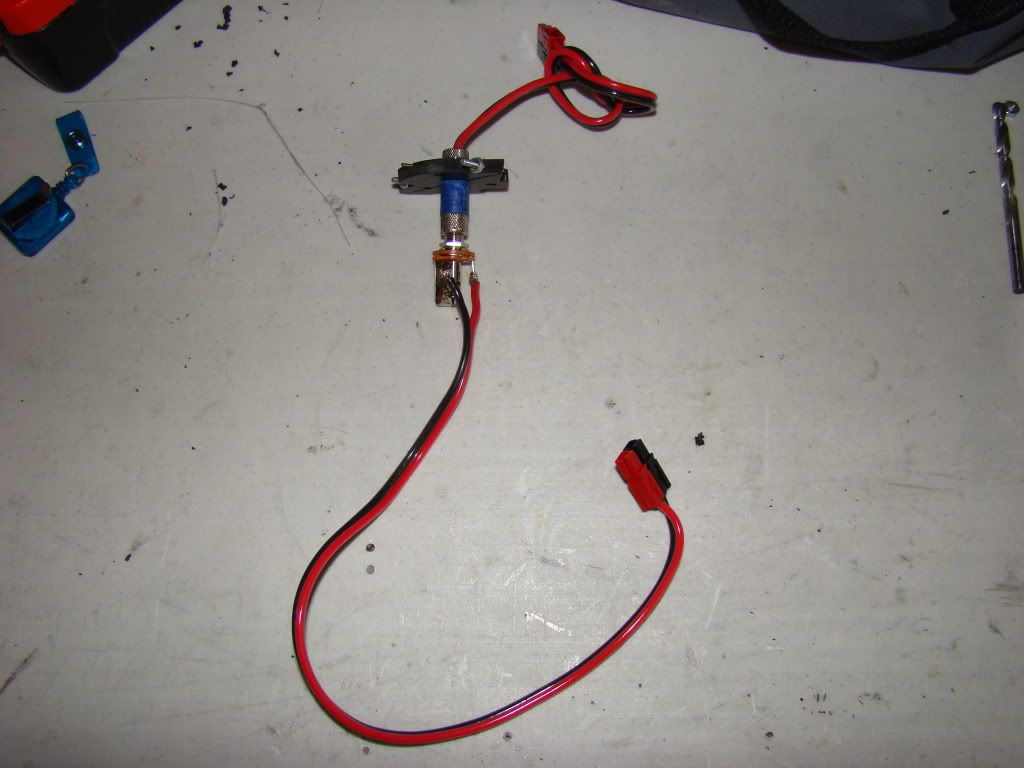
It's already worn down on the contact spots, and no longer spins freely. It's kind of "grindy"... if that makes sense to you.

Anyway, last pics are of something I came up with to keep the slack in the power wires from dropping under the JAG plate and getting snatched out when the dome turns, which happened before.

Photobucket

Photobucket

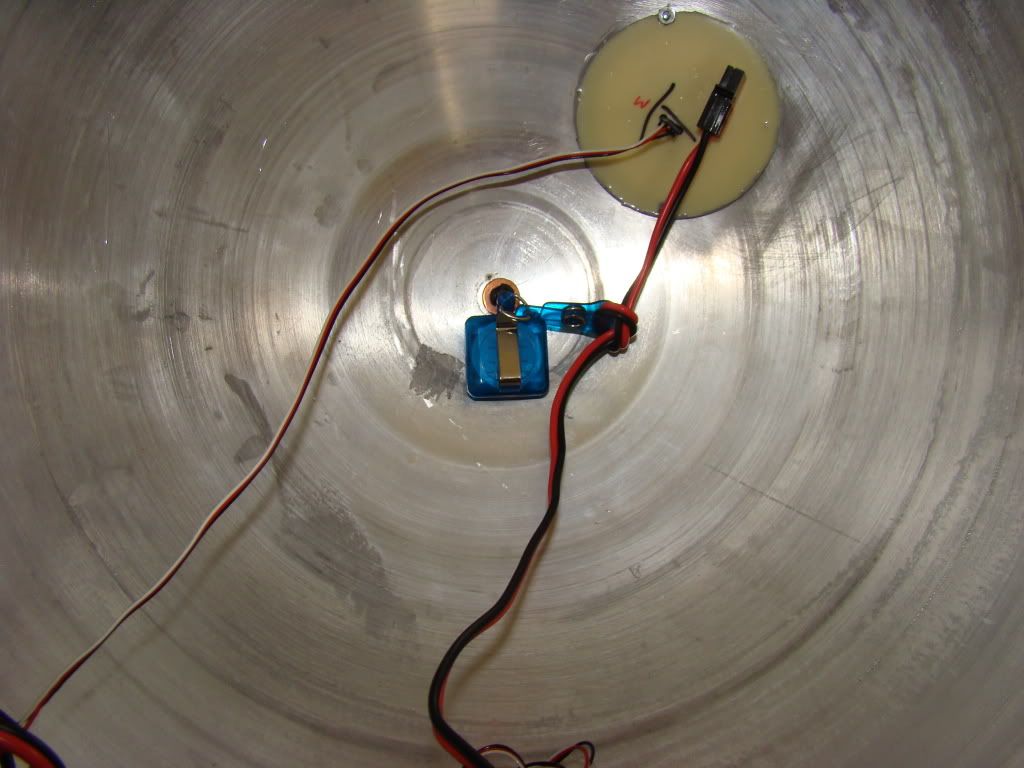
I used that "gator" velcro, the kind with hooks on both sides to attach an ID badge holder to the top of the dome. It pulls the wire just enough to keep it up out of the way when things are turning, but not enough to disconnect the power wires. It's amazing the stupid ideas that turn out to work pretty well sometimes :)

Anyway, that's all for now. Not sure when the next update will be, since I don't have anything pressing to work on at currently...

Saturday, July 3, 2010

Upgrades and such

So, now that I've posted event pics, time to talk about the things I'm working on.

The phono plug slip ring never REALLY worked well. No matter what I tried, eventually the male side of the plug would wind up binding in the female half, which would twist the wires inside the male half of the plug until they shorted. I had small fuses on either side of the slip ring to protect the JEDI display components, but it was really annoying to replace the fuses every time it shorted, and to worry about not being able to replace the display components.

I took pics of the things I tried, but since they didn't work, there's no point posting them really.

What I'm going to do is remove the slip ring and place a new 12V 5ah battery on the JAG plate that's on my rockler. I'll use this battery to power the display systems in the dome, leaving the voice and the dome motor connected as they currently are.

In the next day or two I'll actually get this done and will try to remember to post a pic or two.

WSMI at the USSRC, 6-26-10

Ok, so it's been a couple of months since my last post, just been waiting for something awesome, and this was it! And, I must say it was awesome to take R2 out of the house and not bring him back home broken!

We'll start off with the group pics from Sat AM:

Photobucket

Photobucket

From left to right are, my R2, Chris Lee's R2, R2-KT (like you didn't know that...right?), and Dan Baker's R2.

Next up, some closeups, my droid:
Photobucket

and a shot of R2-KT and Dan's R2:
Photobucket

Some action shots of my R2:
Photobucket

Photobucket

Photobucket

Photobucket

Ok, so this one's not really accurate, but like I was really going to pass up the shot:

Photobucket

The driver shot:

Photobucket

And I'll close the pics off with these two. Cheralyn (of R2-KT's party) set these pics up early Sunday morning before I showed up to the staging area. I'll leave it up to you to decide what you think the punch line is...

Photobucket

Photobucket

Thursday, April 8, 2010

Been a while...

As the title says, it's been a while since I posted anything. Plain and simple, Artoo has been out of comission since oh, maybe 2 days before ChattaCon (For those of you not here in the South, that means roughly Jan 20th...).

Whilst re-wiring Artoo to run at 24V instead of 12V, I accidentally reversed the polarity of my drive motor batteries. I know, it was a bonehead dumba$$ mistake, but you get so used to things that you stop paying as much attention as you ought to be, considering what you're working on.

Luckily I had the forethought to research all the components, and had moved my Syren10 Dome motor speed controller to the front (voice and lights) fusebox, since it doesn't run at 24V (best I can tell from their website) so the only damage was to my SaberTooth 2x25, which went 'pffft' and didn't work anymore.

Even though it took me pretty much 2 months and 3 speed controllers to get a working piece of hardware, I still can't say enough about how great the customer service and tech support is at Dimension Engineering. The first one I ordered was damaged in shipping, and the second one had issues. 'Third time is the charm' isn't it?

Anyway, today I got the replacement speed controller and Artoo is now running at 24V. Well, no smoke came out and the wheels turn in the directions they are supposed to. This being Alabama and all, I had him up on bricks so I could test drive without him knocking things over or running into furniture.

Now onto improving the home-made phono headphone jack slip ring! Next post, hopefully not 4 or 5 months down the road :)