No pics today...still working on "skinning" the legs with sintra. All that's left is the strip over the top of one leg. Takes a lot of CA glue to get that done.
What is new, is I did send a large order to
Resin Parts.com. not sure when it'll come in, but it's all kinds of stuff. Mostly parts for the legs. I'm looking most forward to the "Beefy Ankles" that they sell.
I guess the main reason I keep putting off the last little bit of leg stuff is that all I will have left after that will be the skins for the frame. I know once I start it'll be nothing, like the rest of it has been, but anyway....
Saturday, November 22, 2008
Monday, November 17, 2008
Leg Pipe Joining Thingy
A guy named zorg made a post on Astromech.net and called this the "Leg Pipe Joining Thingy", but I'll shorten it to LPJT. :)
In order for this post to make any sense about how the LPJT will work, you might need to read the previous post first, to see how my shoulders work. I'll wait while you do that :)
Well, right now my plan is to have 1 pipe (3/4") between the shoulders, instead of trying to find the 1" pipe and the 3/4" pipe to fit inside it.
Here's what I have so far:
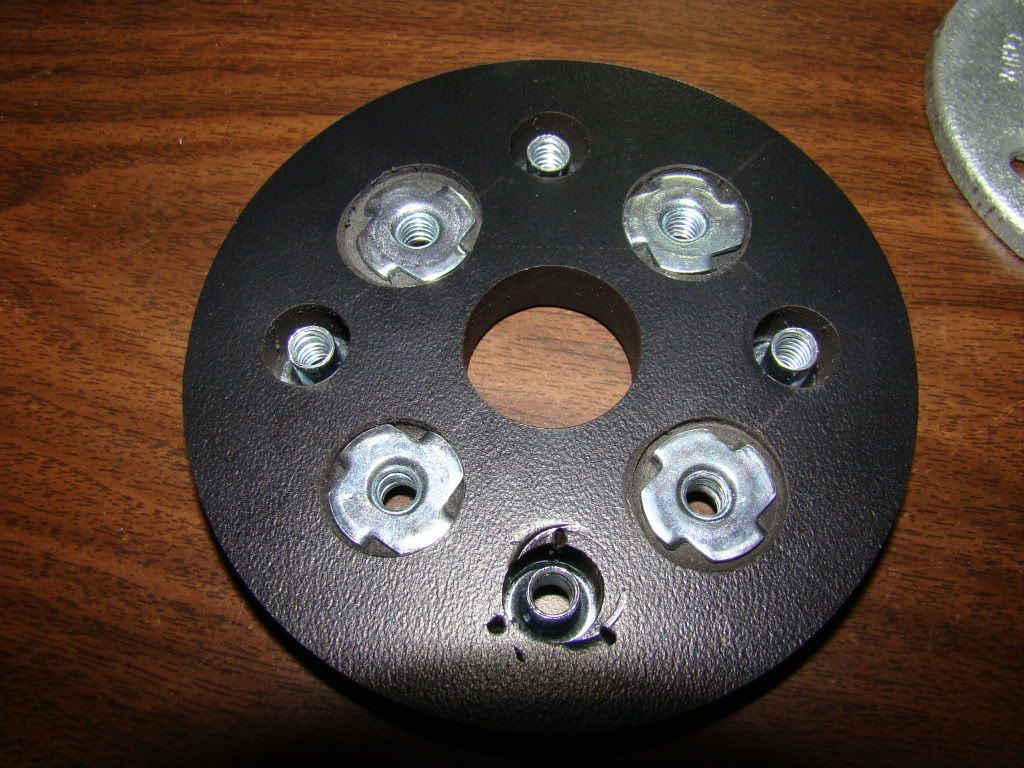
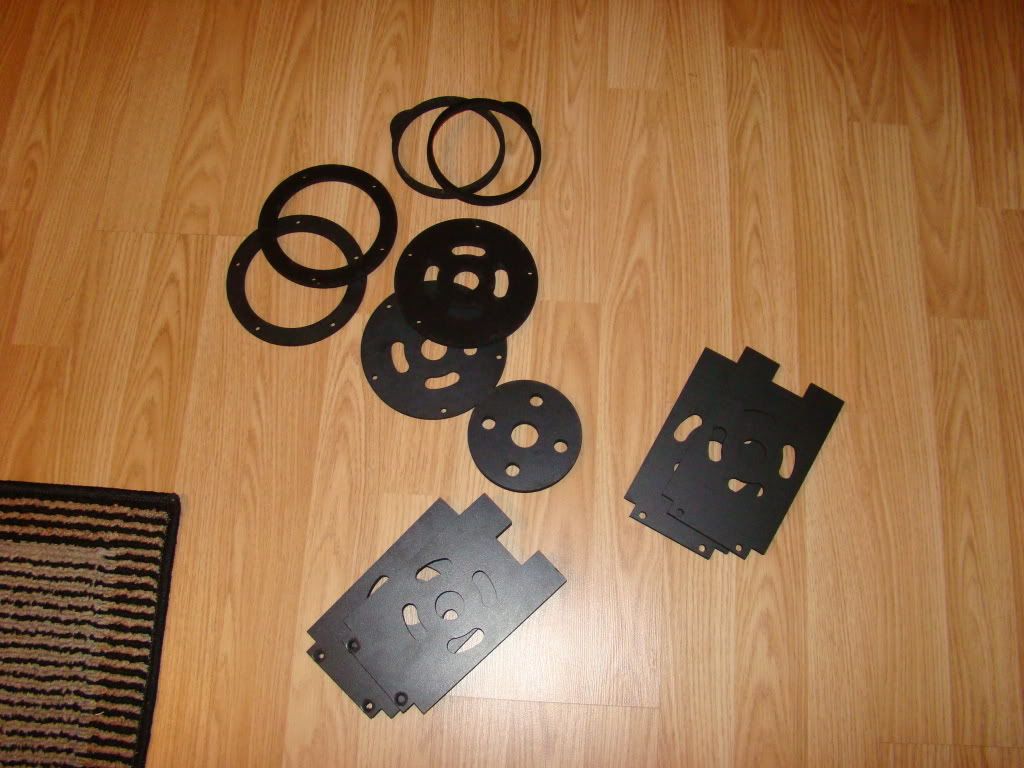
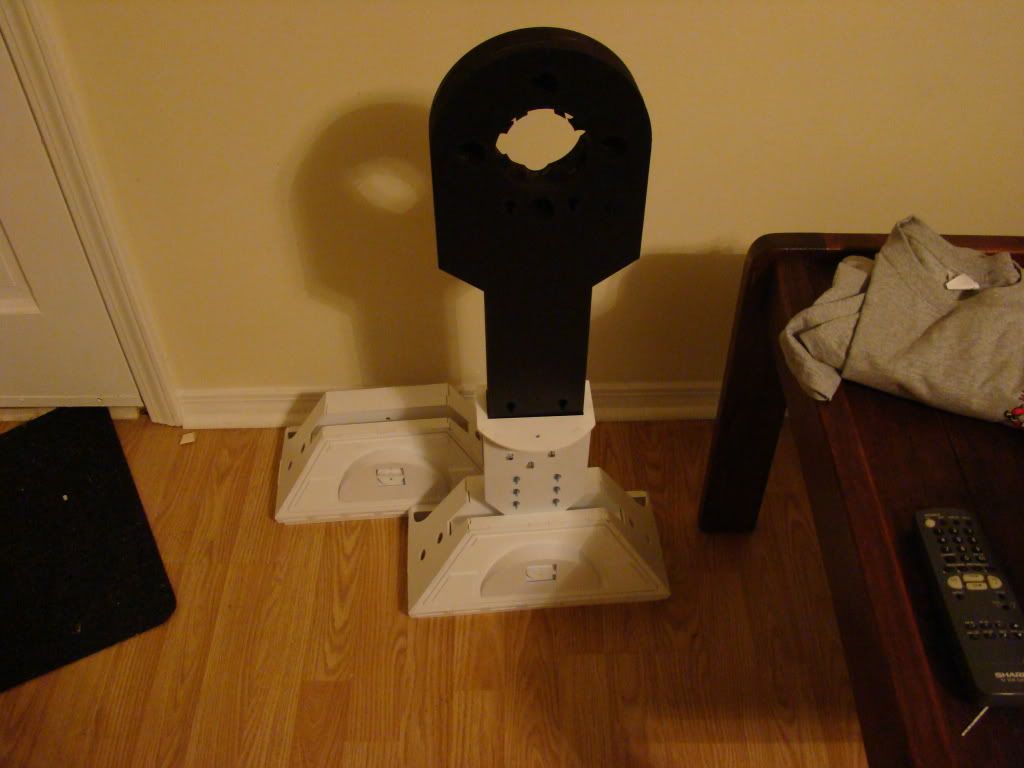
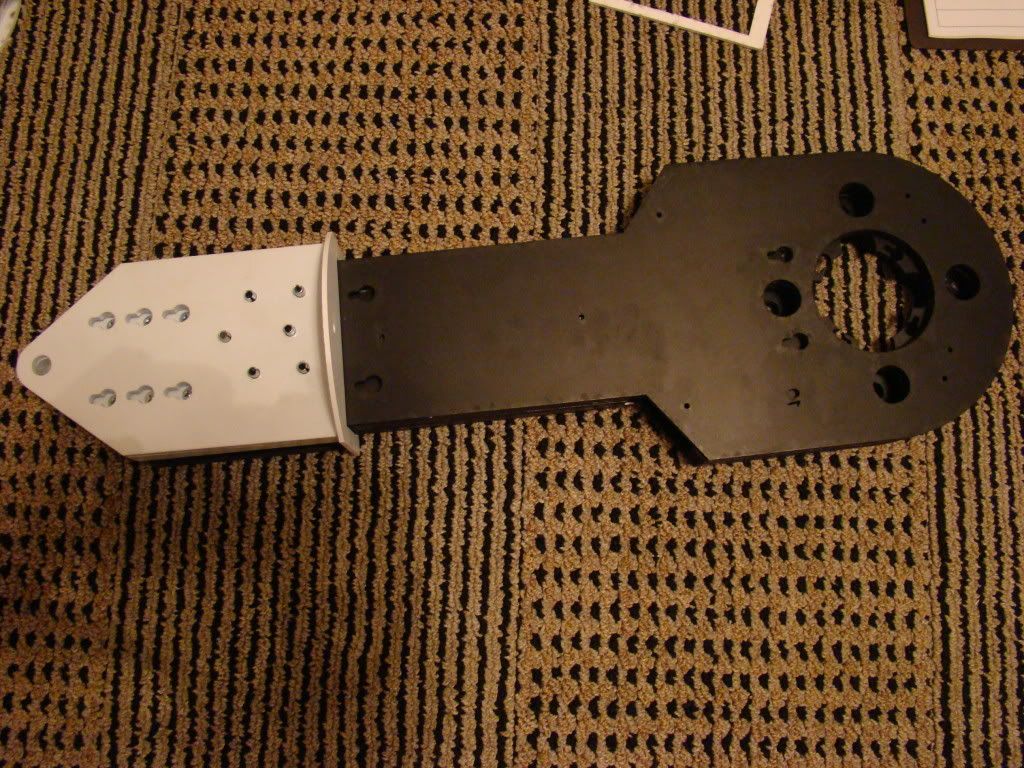
I took the inside circles that already had T-nuts (which hold the legs onto the body) and added new holes for another set of T-nuts, like so:

The new set of T-nuts will come from the other side. In order for the leg to still rotate smoothly when the bolts are loosened, I had to countersink the new T-nuts with a handy-dandy new 3/4" Forstner bit:
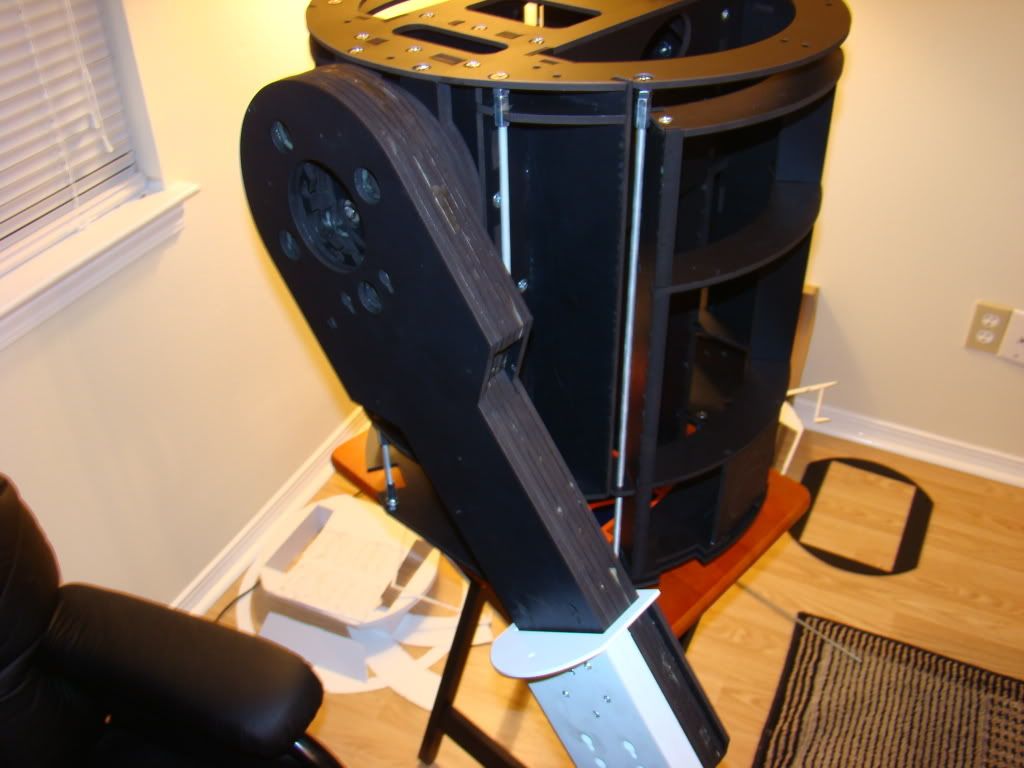
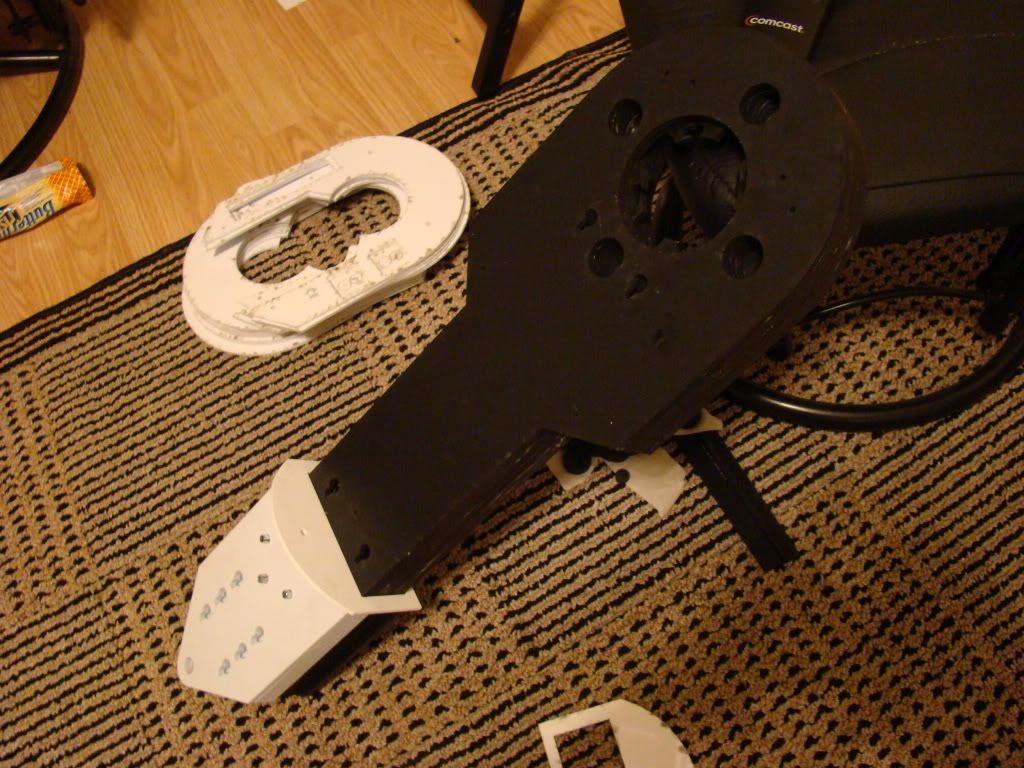
The trick is that now that the T-nuts are facing opposite directions, the legs will bolt into one side, and the flange is bolted onto the other side, facing into the frame. Here's a front and back shot:
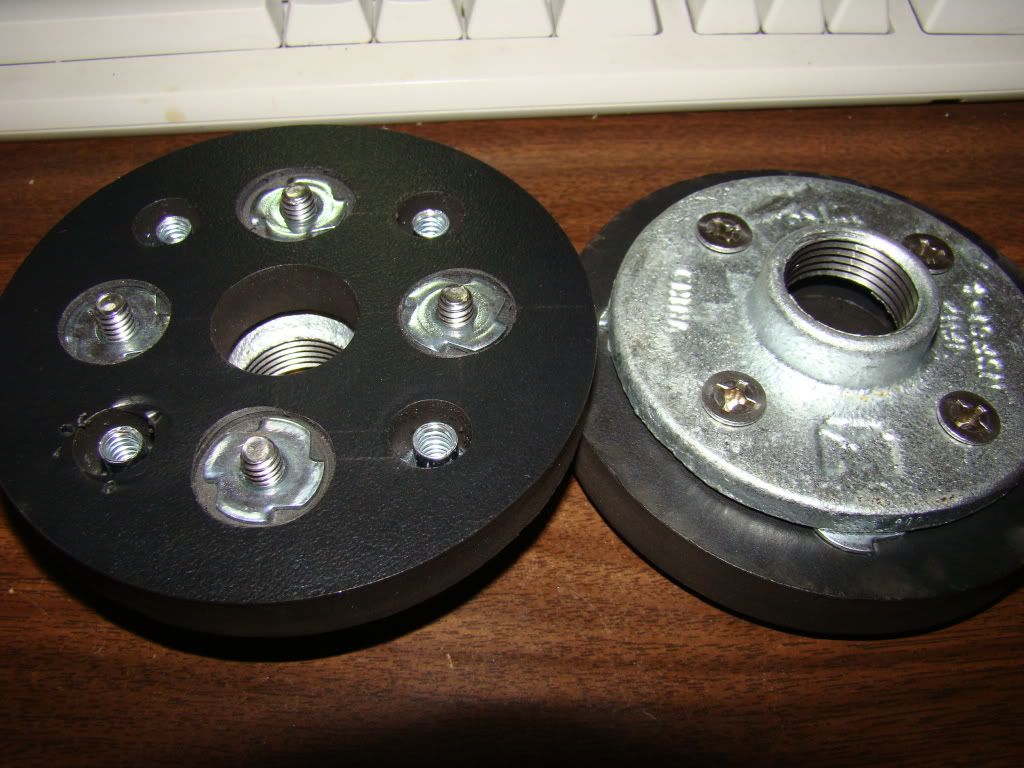
If I find out why 1 pipe doesn't work for everyone else (the hard way, I guess) I should be able to swap out one of the flanges and change it to the 2 pipe type. I do still have 2 more of the round thingies in case I really messed this up or something...
The pipe i plan on buying is 18" long. Right now my best calculation is that I won't need to have the pipe cut, just threaded another 2 inches or so on both ends. It might be good, depends on the hubs, once I get some.
I guess the idea is that I won't ever have to remove the pipe, or the discs it's attached to either. After pondering the 2 pipe idea, all I can figure is that the pipe is attached to the legs and must have to come apart to remove the legs.
I guess the real test will be how much stress is passed to the pipe with my setup...
***Important Note: The bolts you saw sticking out of the new T-nuts in the last picture will have to be cut down about 1/4". Since you can see them sticking out, there's no way they will move smoothly when the shoulder needs to be rotated***
In order for this post to make any sense about how the LPJT will work, you might need to read the previous post first, to see how my shoulders work. I'll wait while you do that :)
Well, right now my plan is to have 1 pipe (3/4") between the shoulders, instead of trying to find the 1" pipe and the 3/4" pipe to fit inside it.
Here's what I have so far:
I took the inside circles that already had T-nuts (which hold the legs onto the body) and added new holes for another set of T-nuts, like so:
The new set of T-nuts will come from the other side. In order for the leg to still rotate smoothly when the bolts are loosened, I had to countersink the new T-nuts with a handy-dandy new 3/4" Forstner bit:
The trick is that now that the T-nuts are facing opposite directions, the legs will bolt into one side, and the flange is bolted onto the other side, facing into the frame. Here's a front and back shot:
If I find out why 1 pipe doesn't work for everyone else (the hard way, I guess) I should be able to swap out one of the flanges and change it to the 2 pipe type. I do still have 2 more of the round thingies in case I really messed this up or something...
The pipe i plan on buying is 18" long. Right now my best calculation is that I won't need to have the pipe cut, just threaded another 2 inches or so on both ends. It might be good, depends on the hubs, once I get some.
I guess the idea is that I won't ever have to remove the pipe, or the discs it's attached to either. After pondering the 2 pipe idea, all I can figure is that the pipe is attached to the legs and must have to come apart to remove the legs.
I guess the real test will be how much stress is passed to the pipe with my setup...
***Important Note: The bolts you saw sticking out of the new T-nuts in the last picture will have to be cut down about 1/4". Since you can see them sticking out, there's no way they will move smoothly when the shoulder needs to be rotated***
Thursday, November 13, 2008
A&A Shoulders
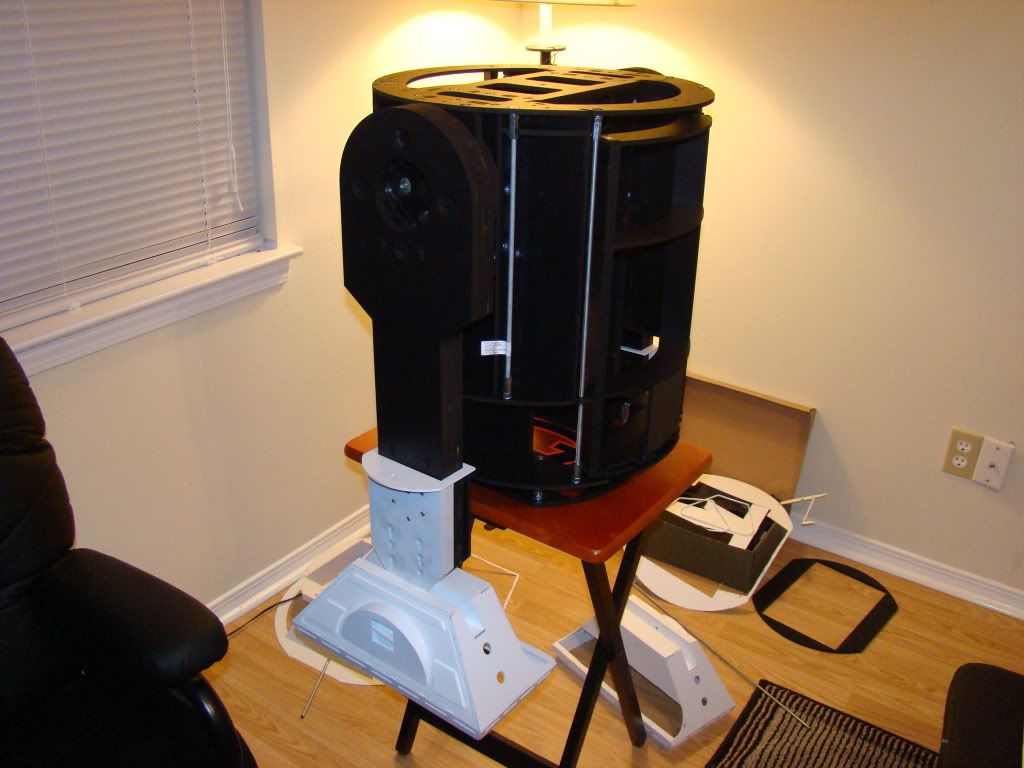
Ok, I said I'd post shoulder pics next, so here they are. I spent a lot of time with the measuring tape and took a leap of faith that one of the parts, mainly the T-nuts would work.

You can see they did :) I used a 5/8" OD 1/2" ID x 1" spacer and the bolts and washers to pull the T-Nuts into the extra pieces, which I'm pretty sure are from the satellite motor shoulders, which I'm not using.
Next up:
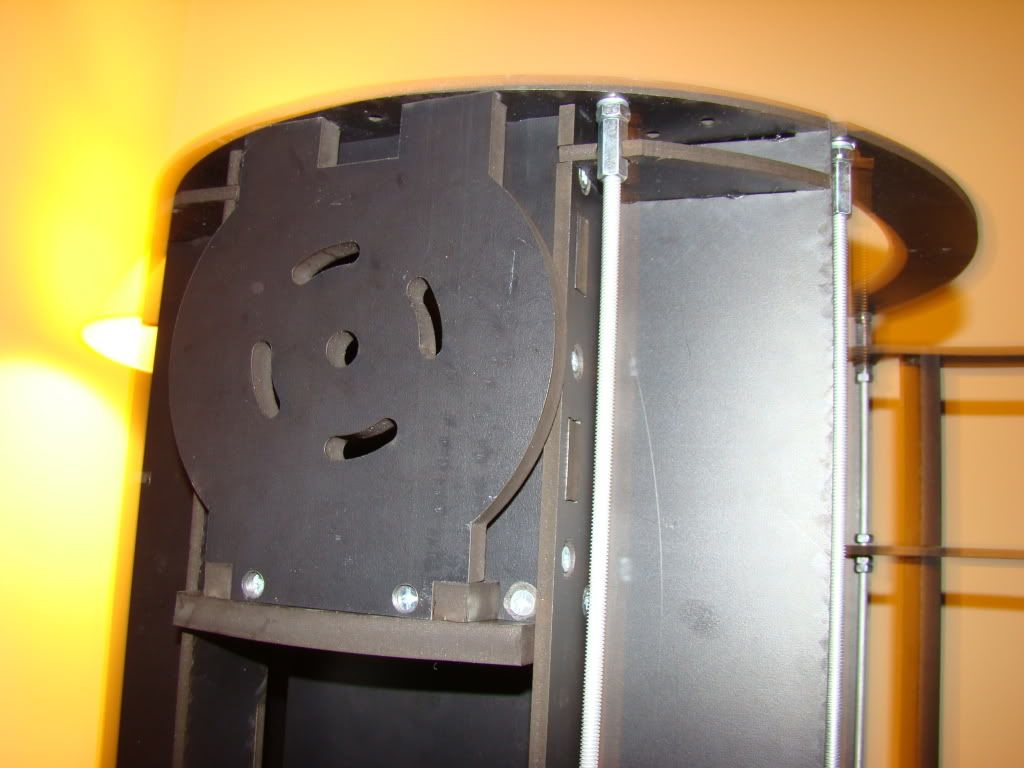
All the pieces stacked together for a test fit. I used the unused pieces from the JAG stops to test with, since they had the correct thickness. You can also see I chose to use all of the shoulder spacers. I THINK there's room to remove one when I'm way closer to done if needed.
I used this piece of the JAG stuff for the actual shoulder, because the slots are 1/4" like the rest of the holes. Didn't want stuff to be all wiggly (and stuff :P).
Here's what it looks like all bolted together:
I used 8x 1/4-20 x 2" stainless hex cap screws (They were only like 17 cents more than the cheap ones), 8x 1/4" hardened flat washers (because hardend sounded like it was better than the plain ones) and 8x T-Nuts Pronged 1/4-20 x 7/16".
The spacer rings were countersunk and screwed to the leg with the 10 x 1 1/2" screws that were left over from the frame build.
That's all the hardware.
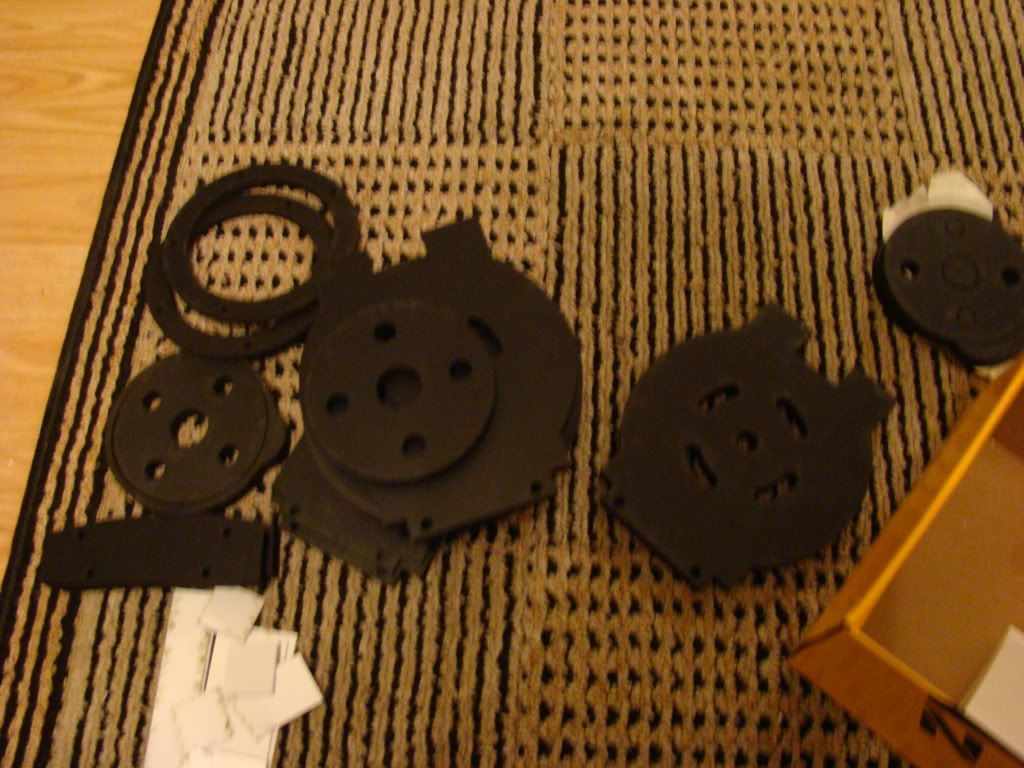
Here's the leftover plastic pieces. The smaller round piece with the holes (not slots) is what's used as the inside piece of the shoulder (the thing the T-nuts are in).
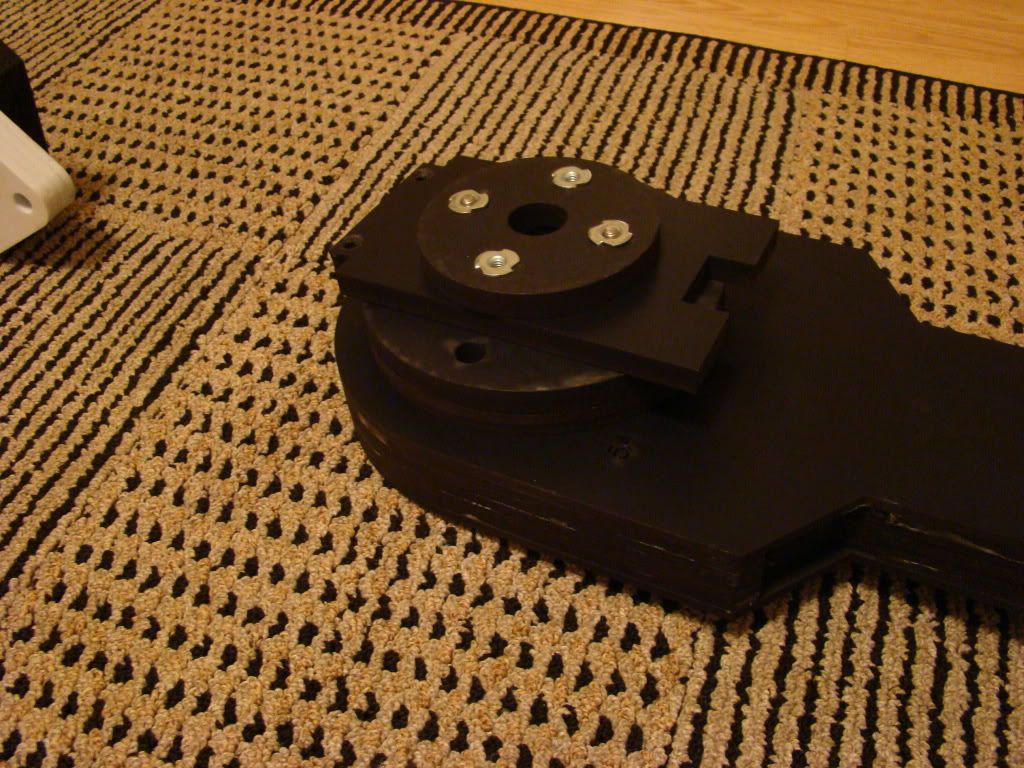
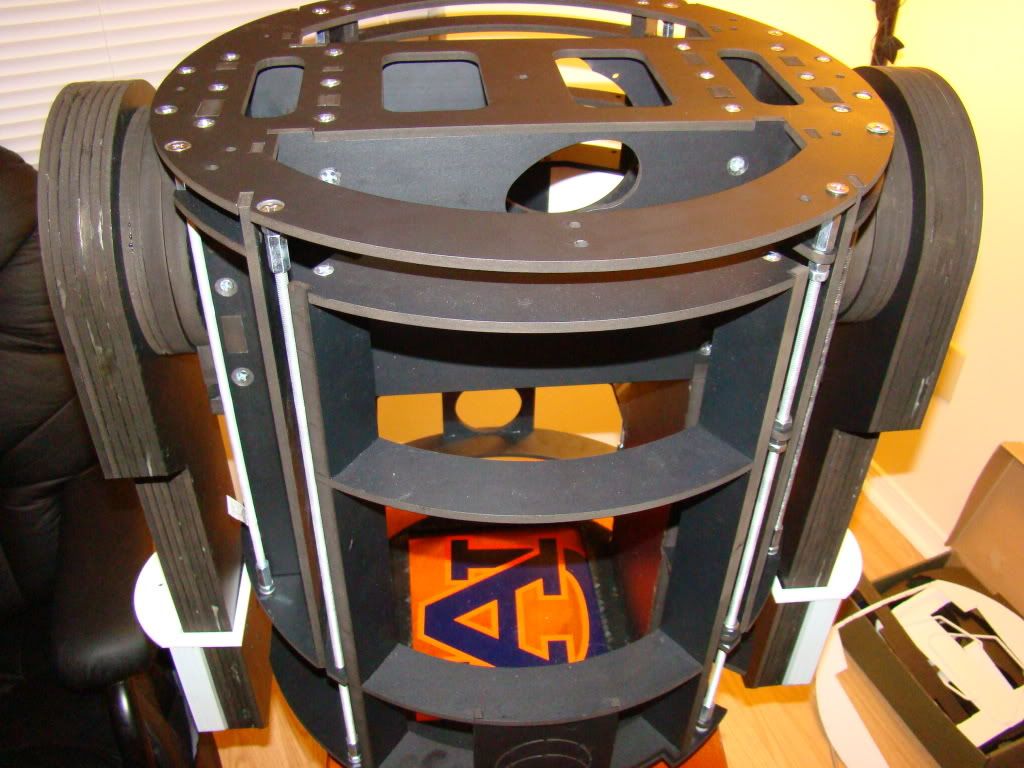
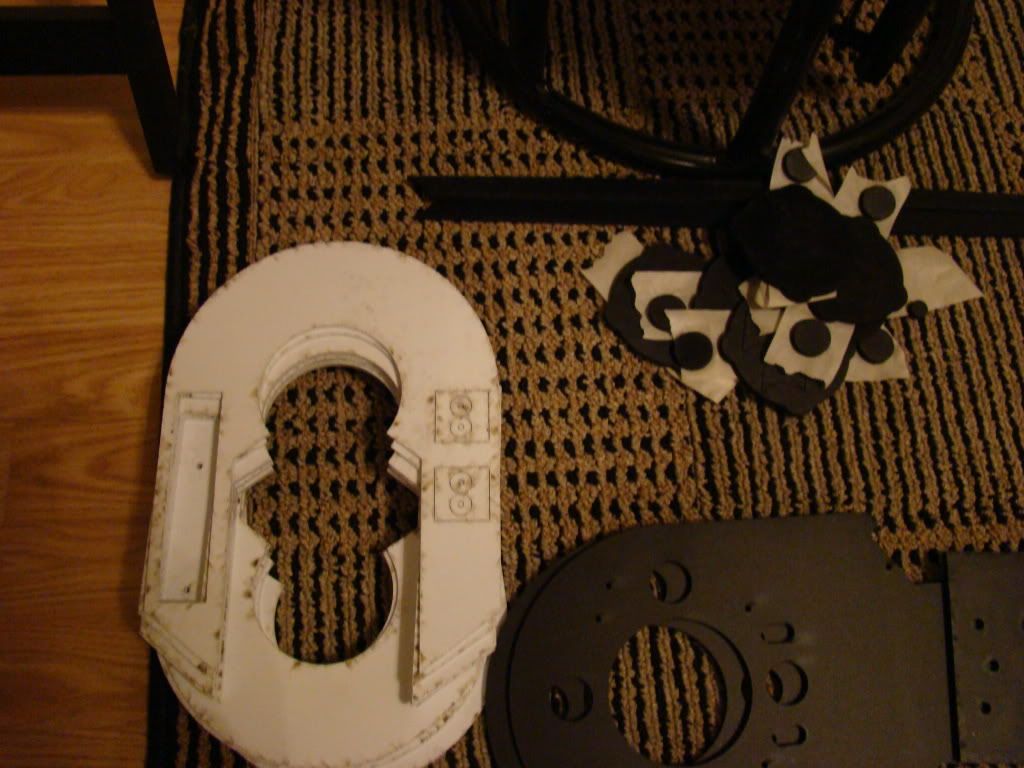
Here's the fun pictures, where the parts start to come together and even this far from finished you can tell what it is...
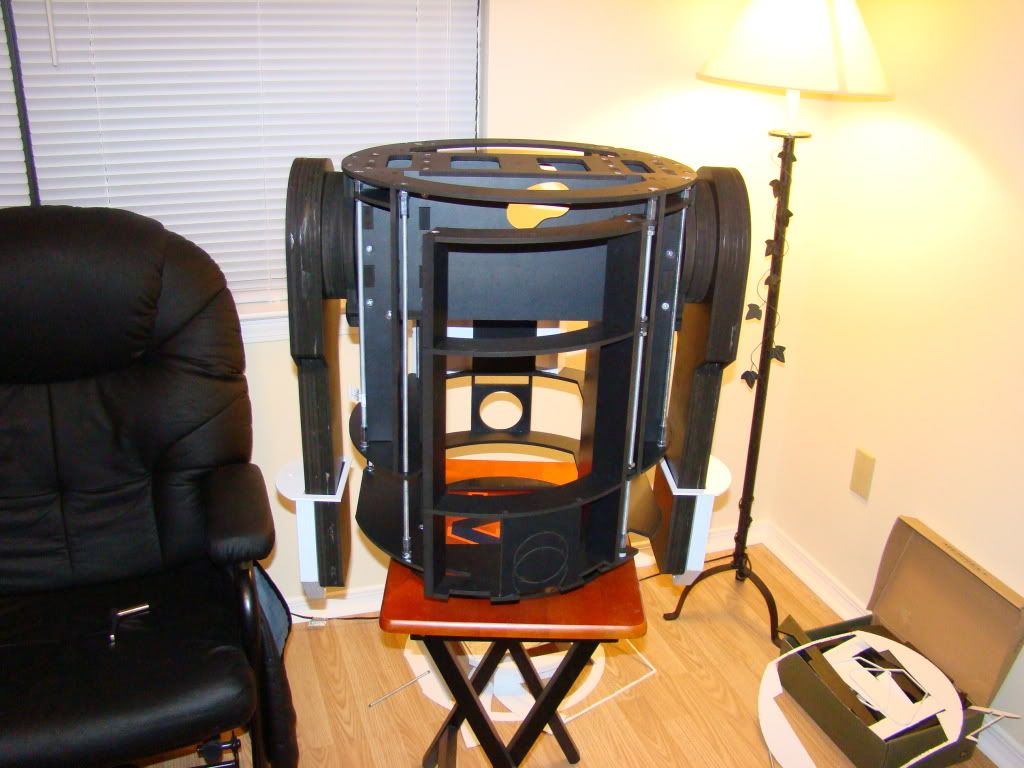
And since one of the feet was kind enough to be tight enough to stay on without a pin or something, some even better shots:
AND:
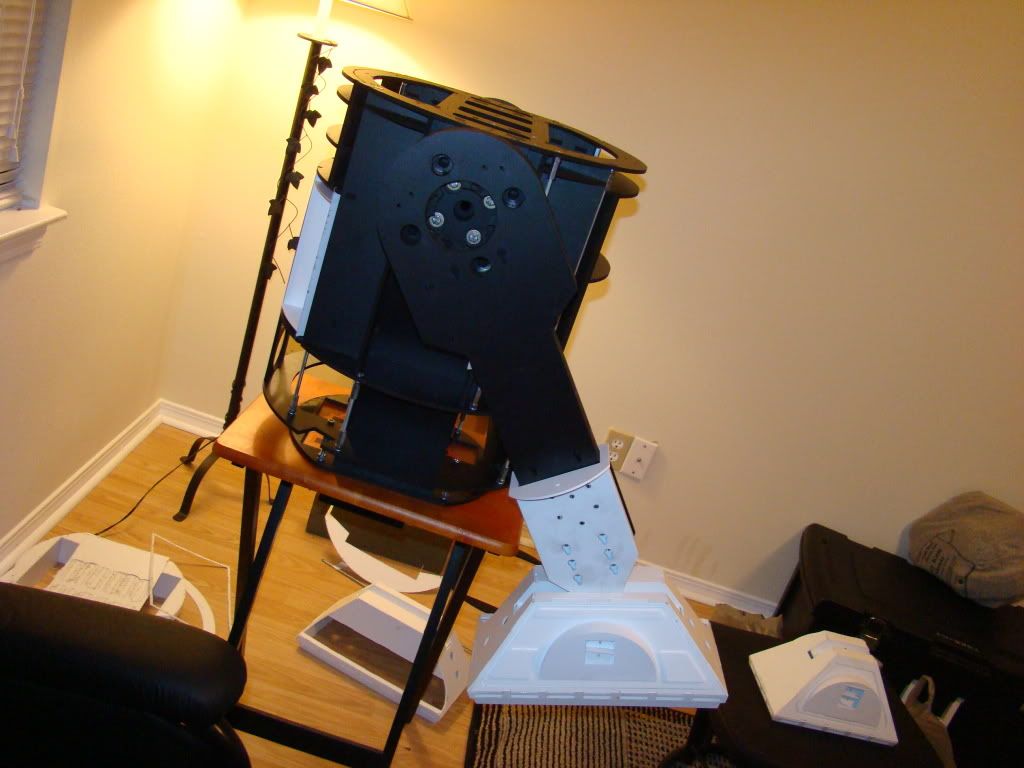
that's right folks, the shoulders are adjustable. Since I used the JAG stops, all it takes is about 1/2 turn with a ratchet on each bolt to have it freed up enough to move to the other position.
Oh, and if anyone is reading this and you should want to see more pics of this, better let me know while R2 is still this naked...
You can see they did :) I used a 5/8" OD 1/2" ID x 1" spacer and the bolts and washers to pull the T-Nuts into the extra pieces, which I'm pretty sure are from the satellite motor shoulders, which I'm not using.
Next up:

All the pieces stacked together for a test fit. I used the unused pieces from the JAG stops to test with, since they had the correct thickness. You can also see I chose to use all of the shoulder spacers. I THINK there's room to remove one when I'm way closer to done if needed.
I used this piece of the JAG stuff for the actual shoulder, because the slots are 1/4" like the rest of the holes. Didn't want stuff to be all wiggly (and stuff :P).

Here's what it looks like all bolted together:

I used 8x 1/4-20 x 2" stainless hex cap screws (They were only like 17 cents more than the cheap ones), 8x 1/4" hardened flat washers (because hardend sounded like it was better than the plain ones) and 8x T-Nuts Pronged 1/4-20 x 7/16".
The spacer rings were countersunk and screwed to the leg with the 10 x 1 1/2" screws that were left over from the frame build.
That's all the hardware.
Here's the leftover plastic pieces. The smaller round piece with the holes (not slots) is what's used as the inside piece of the shoulder (the thing the T-nuts are in).

Here's the fun pictures, where the parts start to come together and even this far from finished you can tell what it is...


And since one of the feet was kind enough to be tight enough to stay on without a pin or something, some even better shots:
AND:
that's right folks, the shoulders are adjustable. Since I used the JAG stops, all it takes is about 1/2 turn with a ratchet on each bolt to have it freed up enough to move to the other position.
Oh, and if anyone is reading this and you should want to see more pics of this, better let me know while R2 is still this naked...
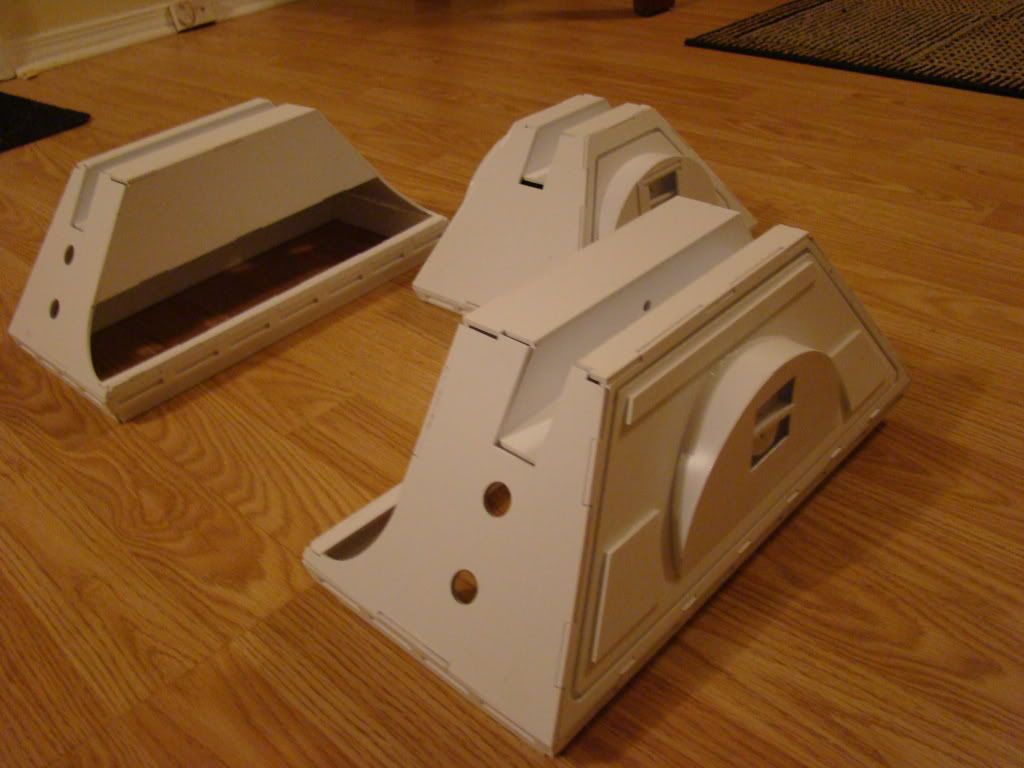
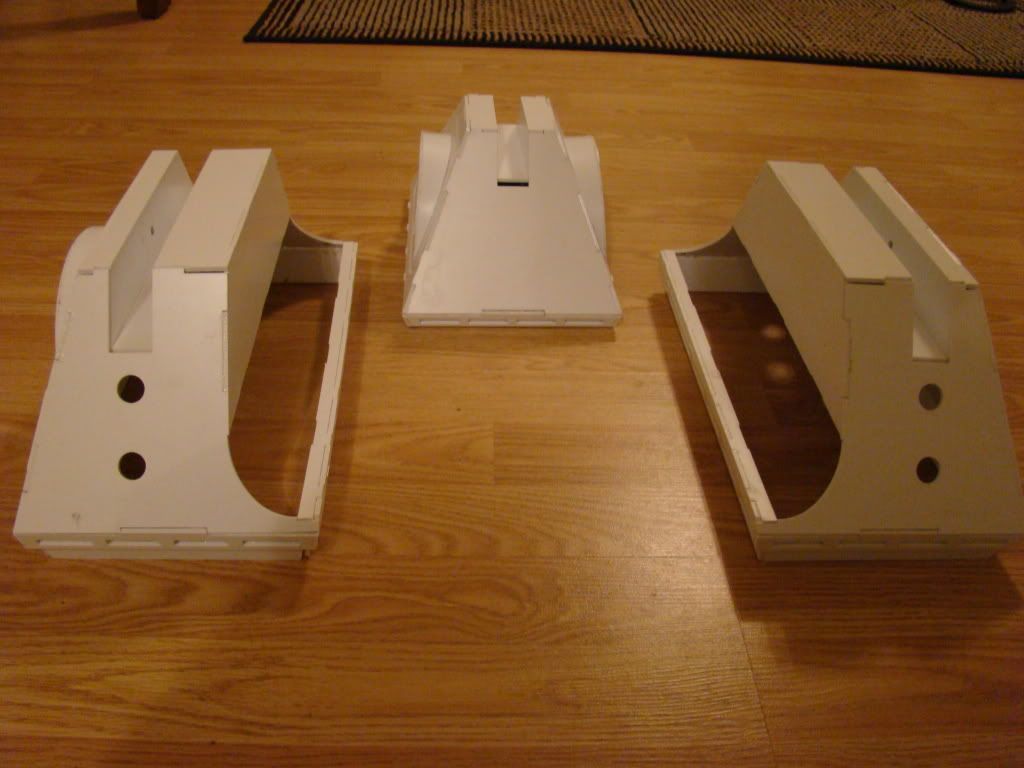
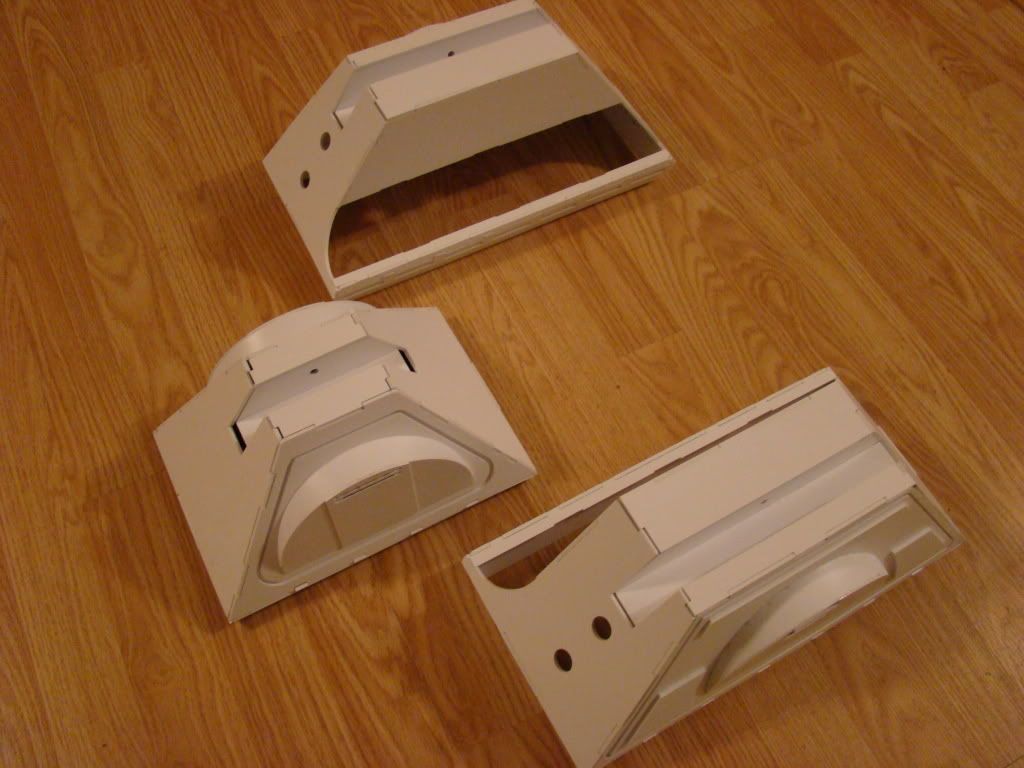
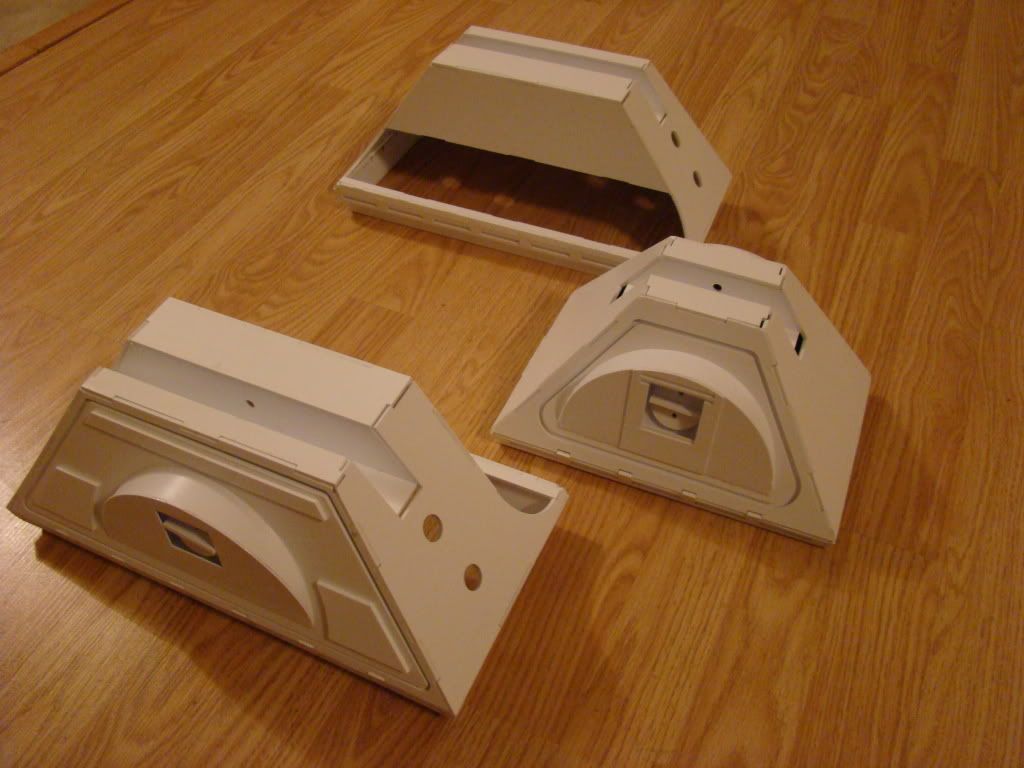
LEGS!
Here's pics of the completed legs. I'm not sure if the pics are of one leg or both. Doesn't REALLY matter, now does it?
Since I mentioned it in a previous post, I'll tell what I did.
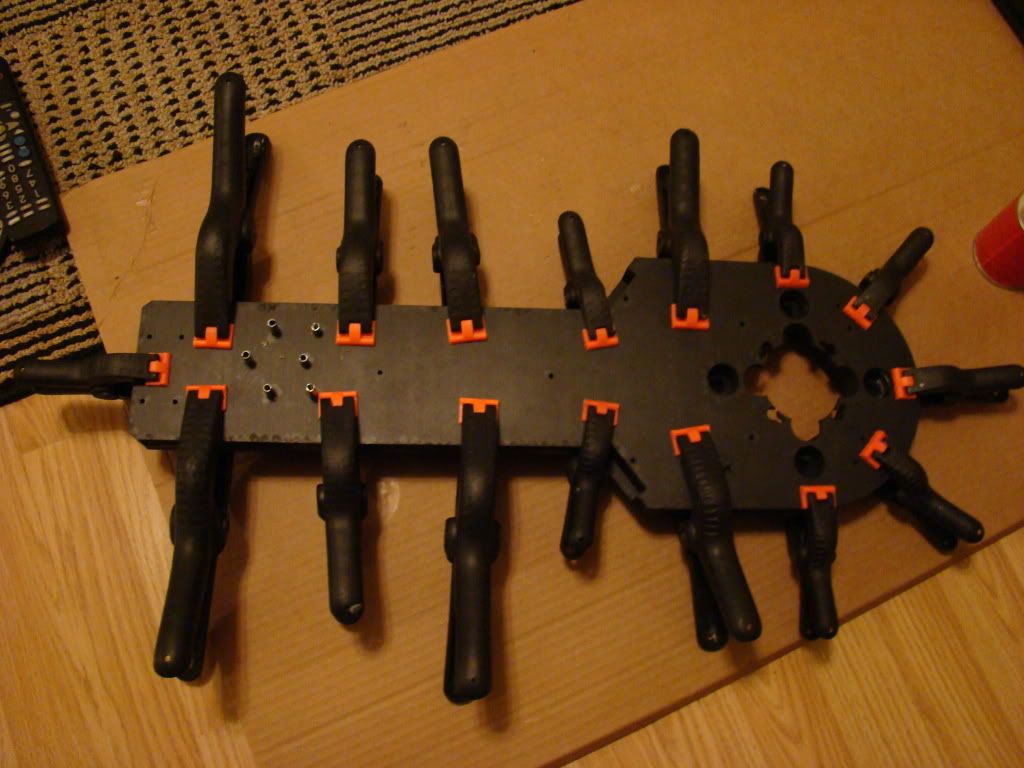
I used PVC Cement, Oatey's, to be specific. I glued the inside layer and the piece with the channel together first, then let the cement set for about 15 minutes. Then every 10-15 minutes I added another layer until the 5 main layers were done. Naturally clamps all over the place.
I let them set overnight (Yes, set, I'm talking about the glue, not the legs...I'd have said "I let them sit overnight"...).
That day I also built the ankles, using CA glue and clamps too.
On the 2nd day I added the 2 outside layers, which include the part that fits into the ankle. I also added the bracelet and the backside of the ankle.
A little more CA glue, and I screwed the ankle in place using the 6 little holes at the bottom of the legs.
Rinse and repeat...
They still need to be "skinned" with the Sintra and have that little line cut around them.
Next post: SHOULDERS! (they are done but I don't have time to post the pics right now...
Since I mentioned it in a previous post, I'll tell what I did.
I used PVC Cement, Oatey's, to be specific. I glued the inside layer and the piece with the channel together first, then let the cement set for about 15 minutes. Then every 10-15 minutes I added another layer until the 5 main layers were done. Naturally clamps all over the place.
I let them set overnight (Yes, set, I'm talking about the glue, not the legs...I'd have said "I let them sit overnight"...).
That day I also built the ankles, using CA glue and clamps too.
On the 2nd day I added the 2 outside layers, which include the part that fits into the ankle. I also added the bracelet and the backside of the ankle.
A little more CA glue, and I screwed the ankle in place using the 6 little holes at the bottom of the legs.
Rinse and repeat...
They still need to be "skinned" with the Sintra and have that little line cut around them.
Next post: SHOULDERS! (they are done but I don't have time to post the pics right now...


Monday, November 10, 2008
Now, for interesting stuff, since no one cares about HTML.
I WAS researching whether it's better to glue the A&A legs together a layer at a time, or to just shoot the moon and do it all at once.
Wish I had a list of blogs for people who built all A&A droids...that would be nice.
Anyway, back to researching
I WAS researching whether it's better to glue the A&A legs together a layer at a time, or to just shoot the moon and do it all at once.
Wish I had a list of blogs for people who built all A&A droids...that would be nice.
Anyway, back to researching
Ok, I figured out why this looks so odd to me. I reset the layout to the simple one so the pictures show full size. Only problem with that is, when you're on a wide screen monitor, the comments I add sometimes show up on the side of the pictures, and appear to be all out of order...
Not in every post. That's the kicker. Only sometimes does it show up like that. If my screen is "restored" to less than full screen it all shows up nice and pretty...maybe I'll check the help section. Yeah, that'll keep me occupied INSTEAD of gluing up the legs like I ought to be.
Or posting pics of the outside feet, which are done (and again by done I mean they still need filling sanding and painting).
Subscribe to:
Comments (Atom)