Well, after a week of being out of town for work, I decided I needed to get some work done.
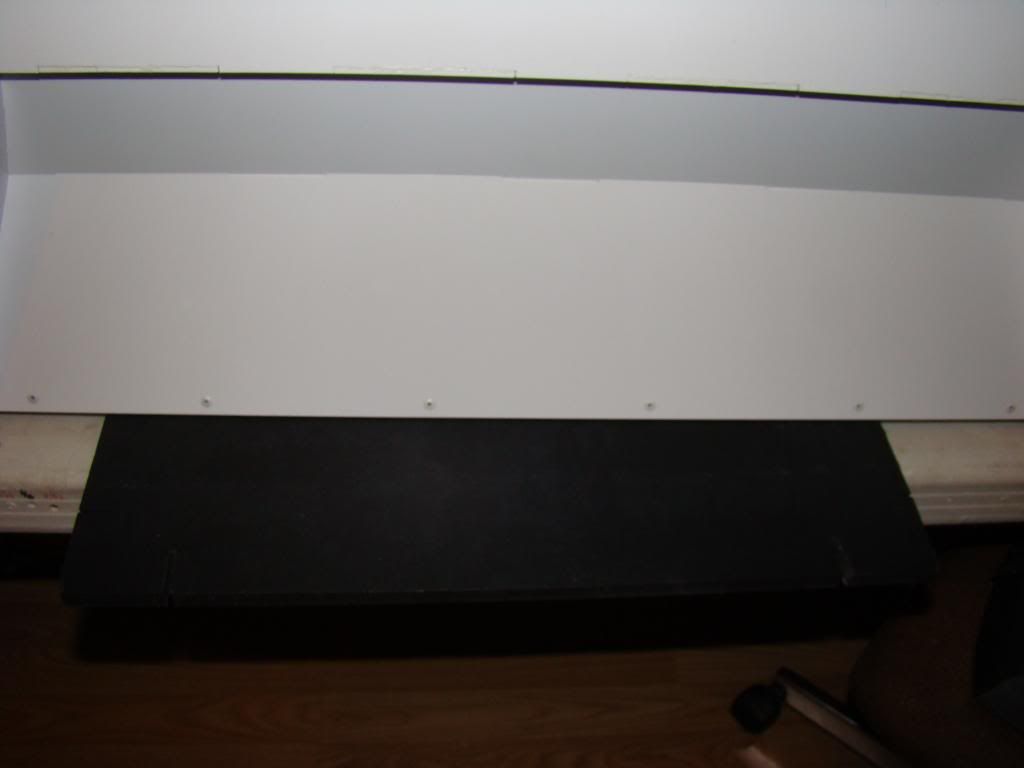
Started off by reinforcing the side panels with some 3/4x1/2" angle aluminum:
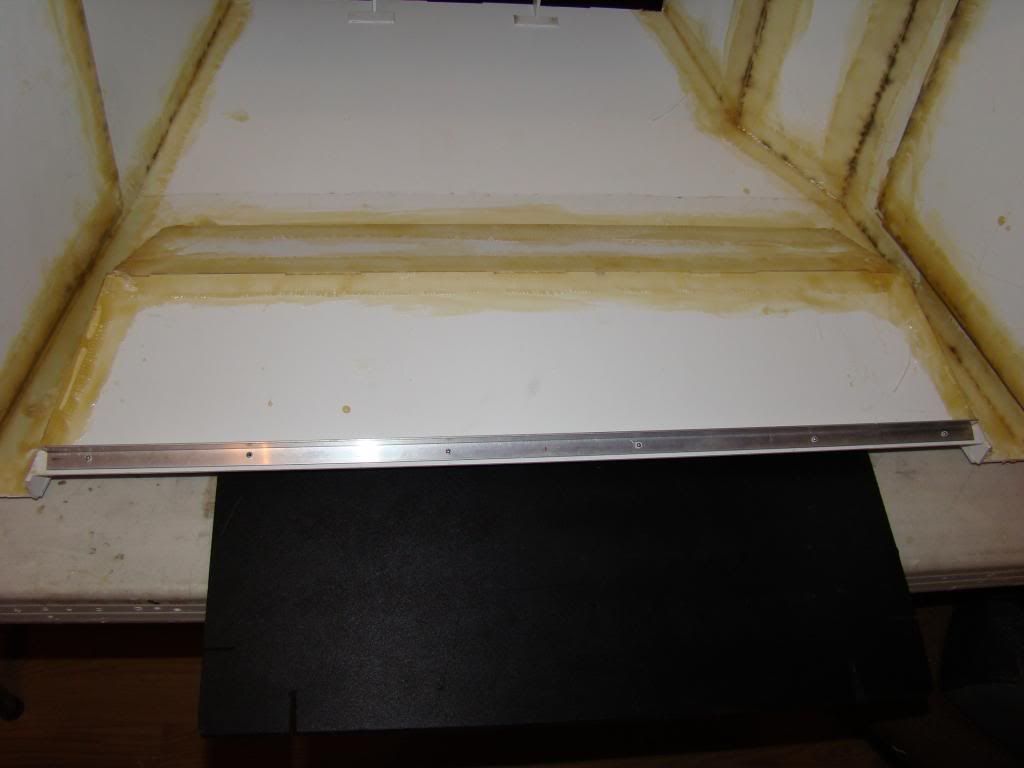
They were getting a little "flexy" and needed stiffening. Front, back, and both sides are done. I used white painted pop rivets, because that's what I had handy, from the old days building storm trooper armor.
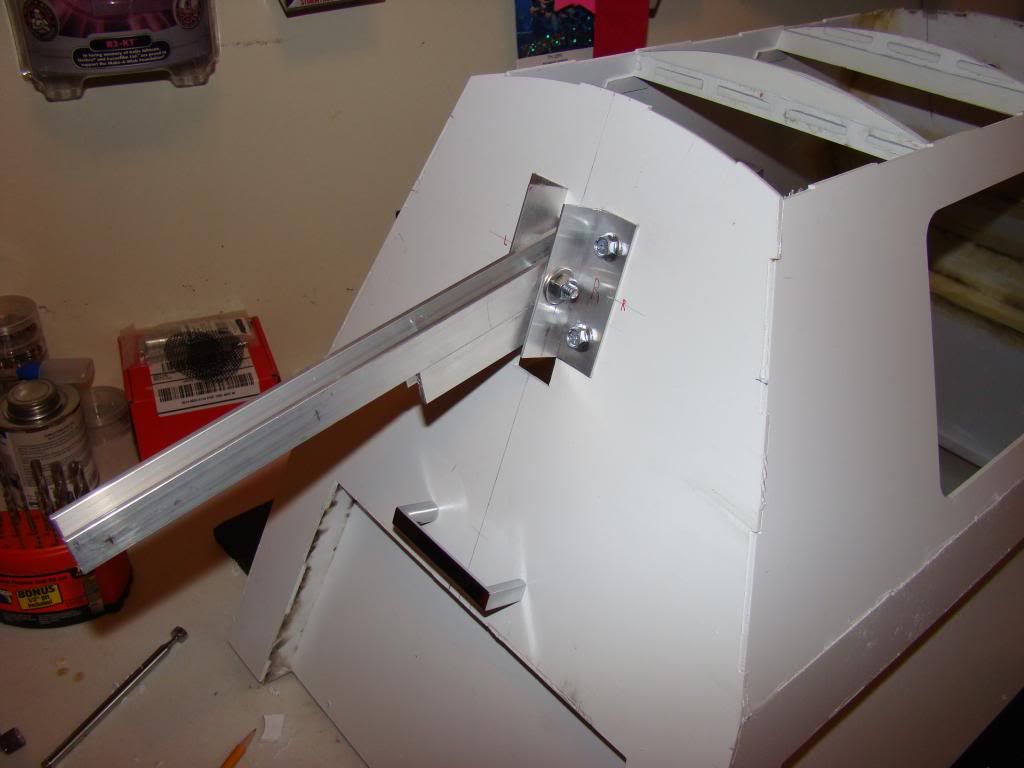
It only took me about 6.5 hours to "engineer" the neck joint. I followed the plans from the K9.replicarobots.com files as best I could, what with them being in mm and not inches. That made things only a little more difficult, since I had to round up or down, depending on what I was buying/ordering.
I used 1" angle aluminum for the left and right mounting brackets, 3" tall on the outside. I used 3/4" U channel for the neck, bought from Amazon, measured to the lengths in the how-to. The nuts and bolts that hold the mounts are 5/8" long, 1/4-20. The bolt that's currently in place for the pivot is 1 1/2" 1/4-20, and will have a nylon threaded lock nut when it's time to assemble it all "for good".
On the inside, I used one side scrap flat aluminum from a cheap yardstick from good ol' Harbor Freight. On the other side I used 1" angle again, this time long enough to act as backing for the handle as well. You can also see that I've cut the notch for the giant Turnigy S8166M that'll move the head. I haven't drilled the mount holes yet, waiting for the servo to arrive first.
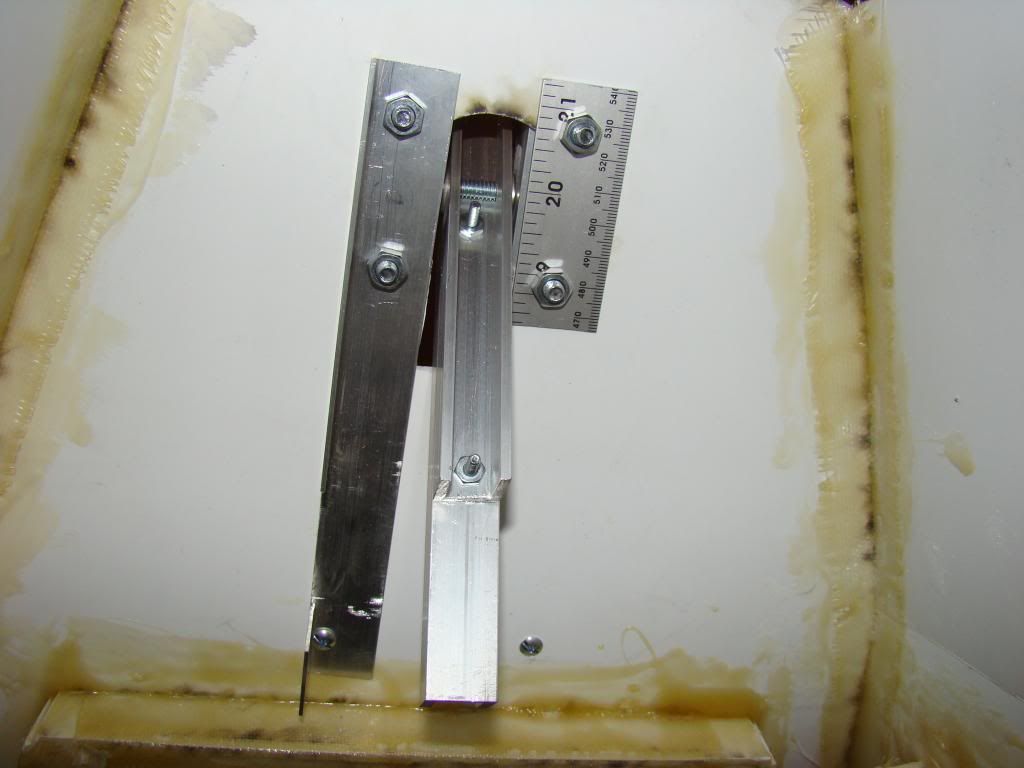
There IS a little issue, well actually a huge issue, but I don't have any pics, so I'll just have to leave you hanging whilst I figure out exactly what to do about it.
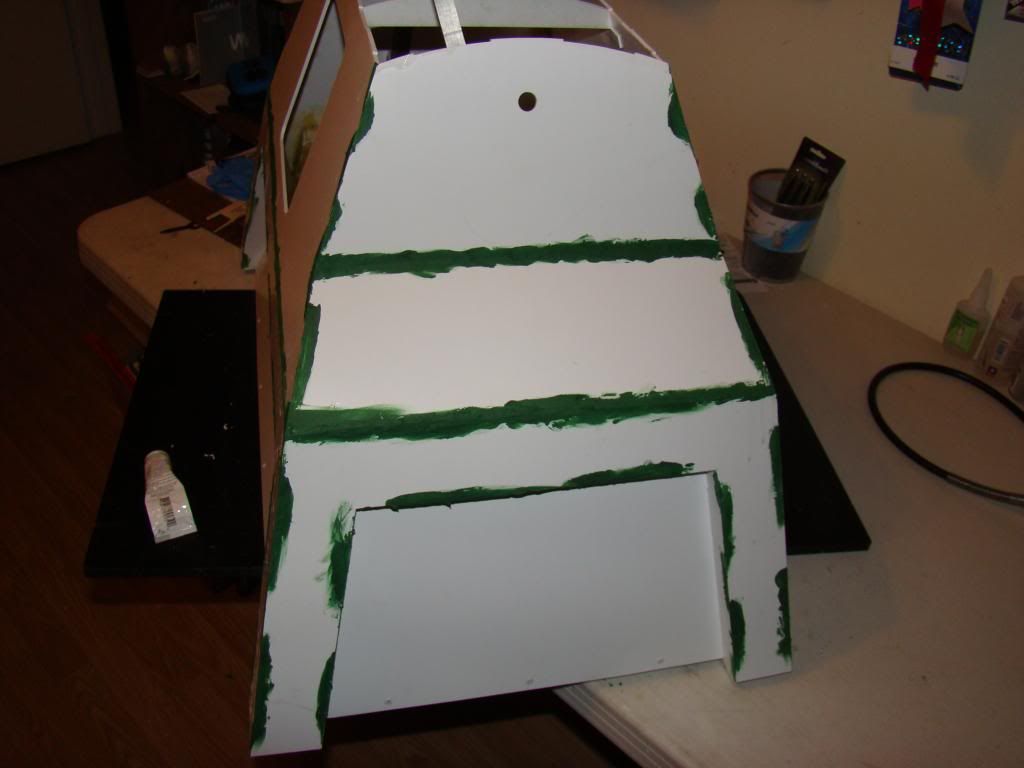
In other news, I also did a little body work. I used "Squadron Green Modeling Putty" from the local model shop as filler. I'd never heard of it until I was checking out another builder's log.
When building R2, I'd previously used CA glue (superglue), which is terrible to sand and super brittle, Bondo body filler, which is heavy and brittle, Elmer's Glue Wood filler, which is easy to use, easy to sand, but doesn't stick to plastic well, and is brittle.
So far, the putty's been easy to apply. It comes out of the tube a little thicker than toothpaste, and applies easily with a finger. It also washes off of said finger fairly easily It did seem to shrink a little where there was a gap to fill. I used a little more than half the tube:
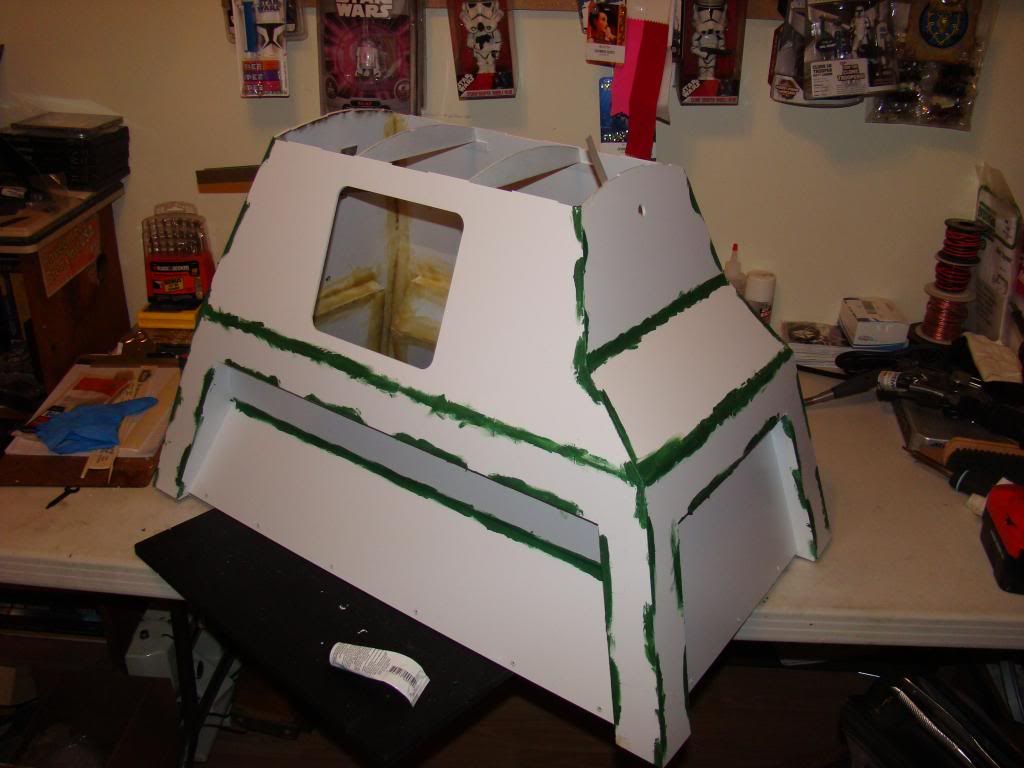
Tomorrow I'll sand and see how it turns out. I'm sure there will be some areas that will need a 2nd application, but I still have half a tube left. After a 2nd application maybe this weekend I'll shoot a little primer on the seams to see how it turns out.
Monday, May 5, 2014
Saturday, April 26, 2014
First Fiberglass Foray
Title says it all, today was my first adventure in fiber glassing. Yesterday I picked up some supplies at Lowe's.
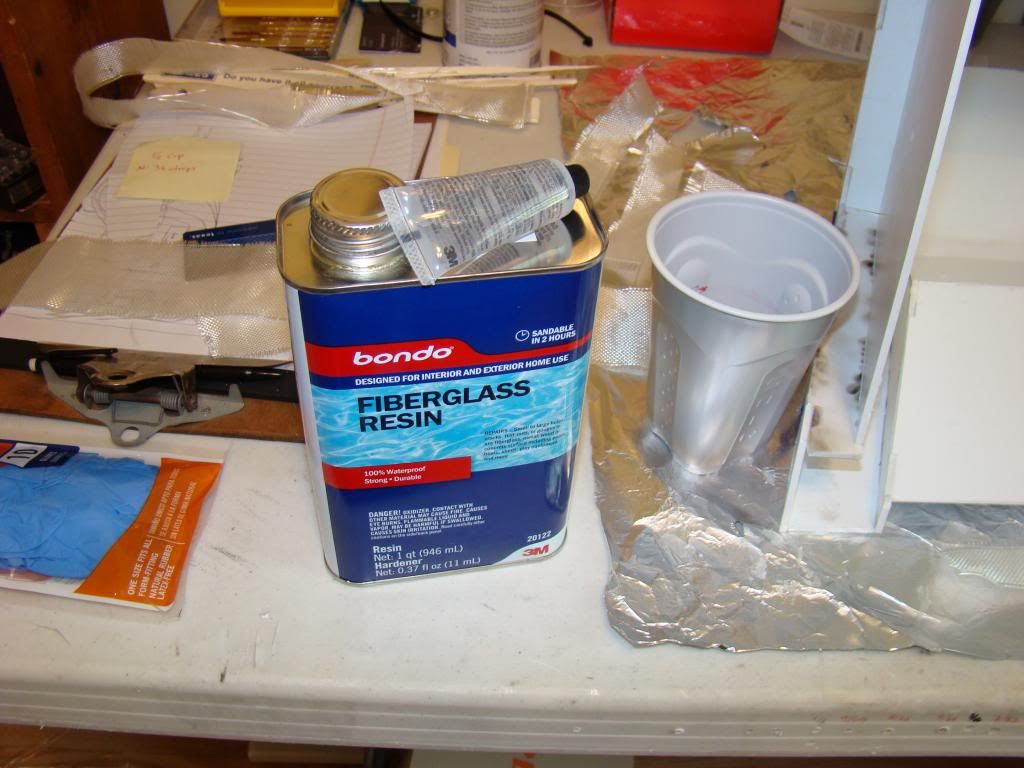
A quart of fiberglass resin and a pack of fiberglass cloth. And a couple of paint stirrers, and the most important thing of all, blue nitrile gloves. The gloves were an afterthought. I had no idea just how sticky this afternoon was going to be, so I'm really glad I picked them up.
Start off with a pic of the resin:
I used the plastic solo cups because I already had them in hand. I had no idea that when the resin finally kicks (chemically sets) it gets hot enough to melt the cup.
Here's my test cup. I used a measuring cup to add 4oz of water to the cup, then marked the level. I also marked 8oz, just in case 4 wasn't enough.
Doing that allowed me to know how much resin I was adding to the cup, so I would know how many drops of liquid hardener to add. The can says "for small repairs, add 10 drops to 1 ounce" and "working time will be 10-12 minutes".
For my first cup I added 4oz of resin and 36 drops of hardener. That didn't give me time enough to use about half of the resin.
For the remaining cups I used more along the lines of 7 drops per ounce, which did give me time to use most of the resin.
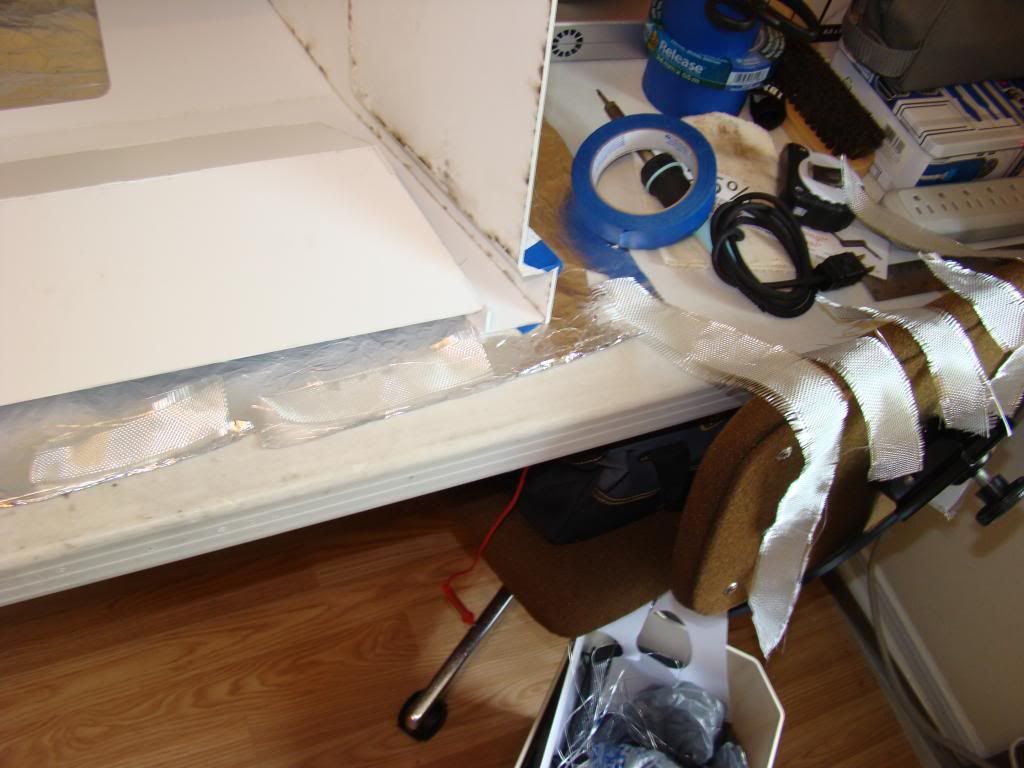
Here's a shot of several pieces of cloth cut to length for the seams.
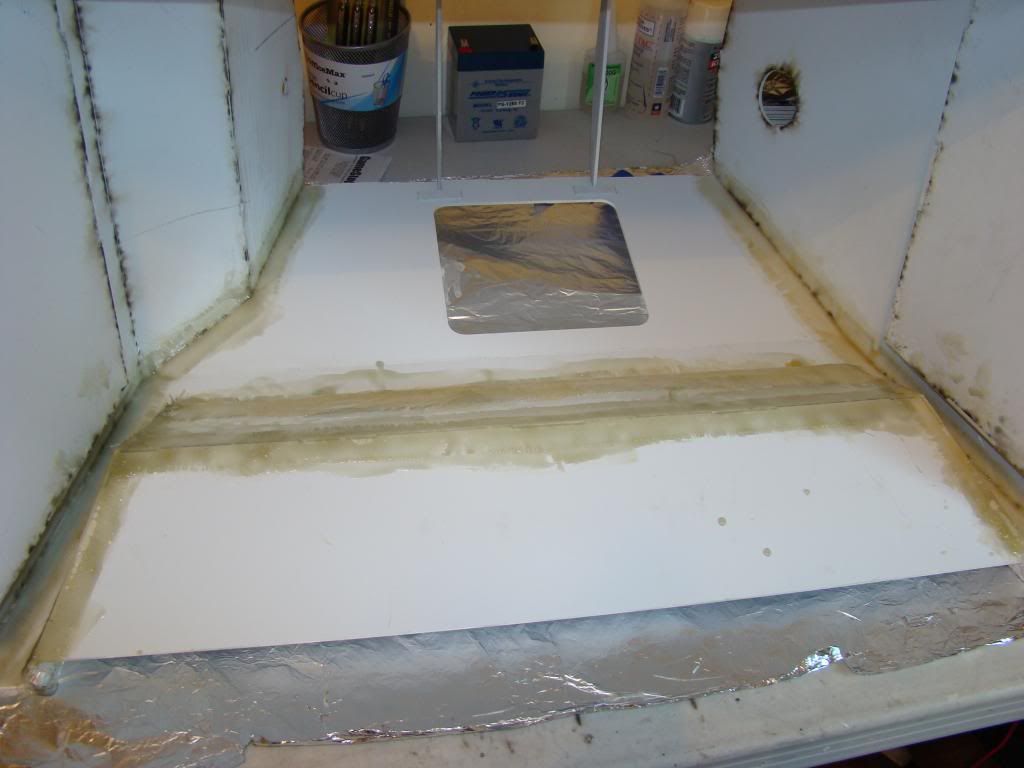
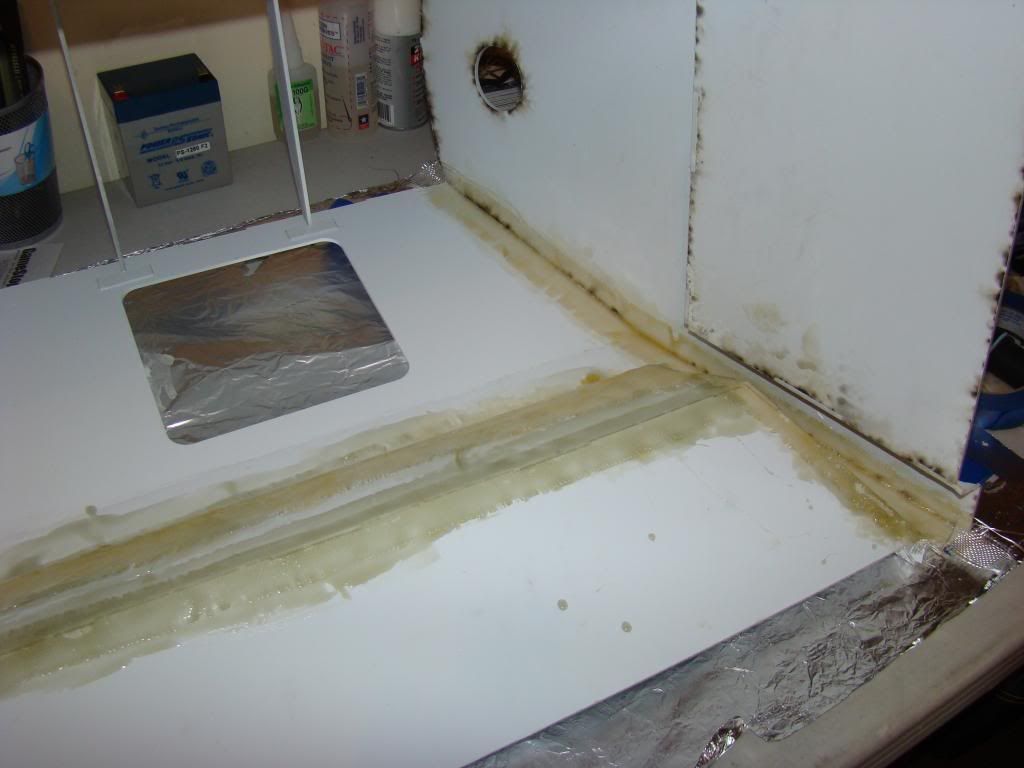
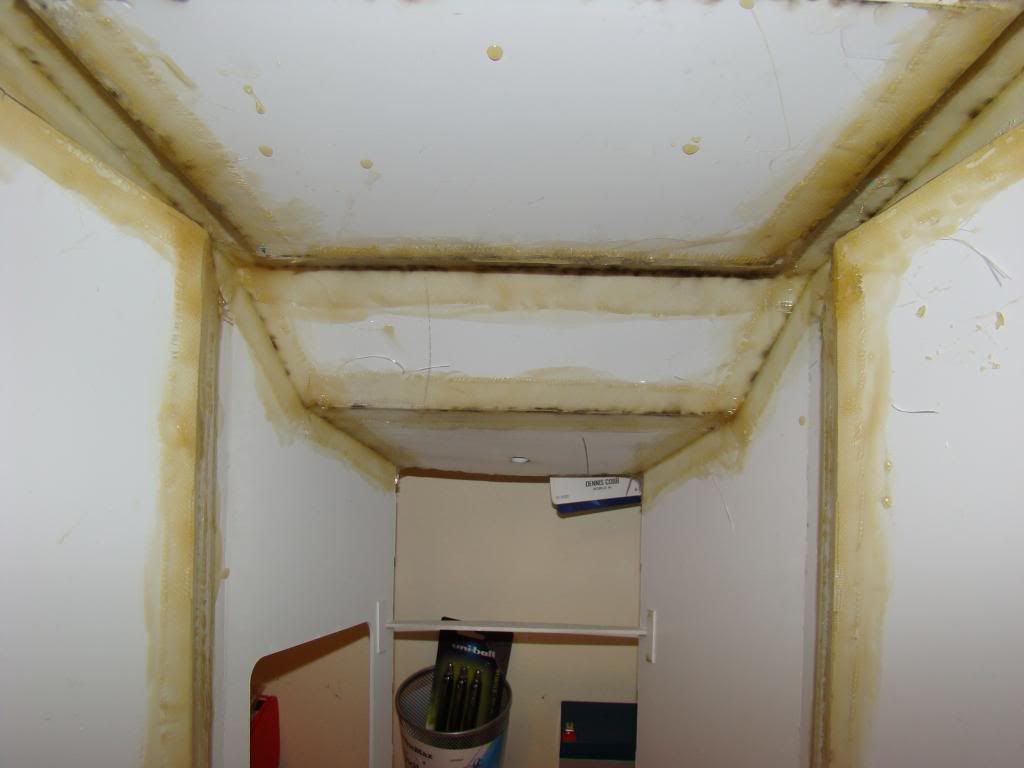
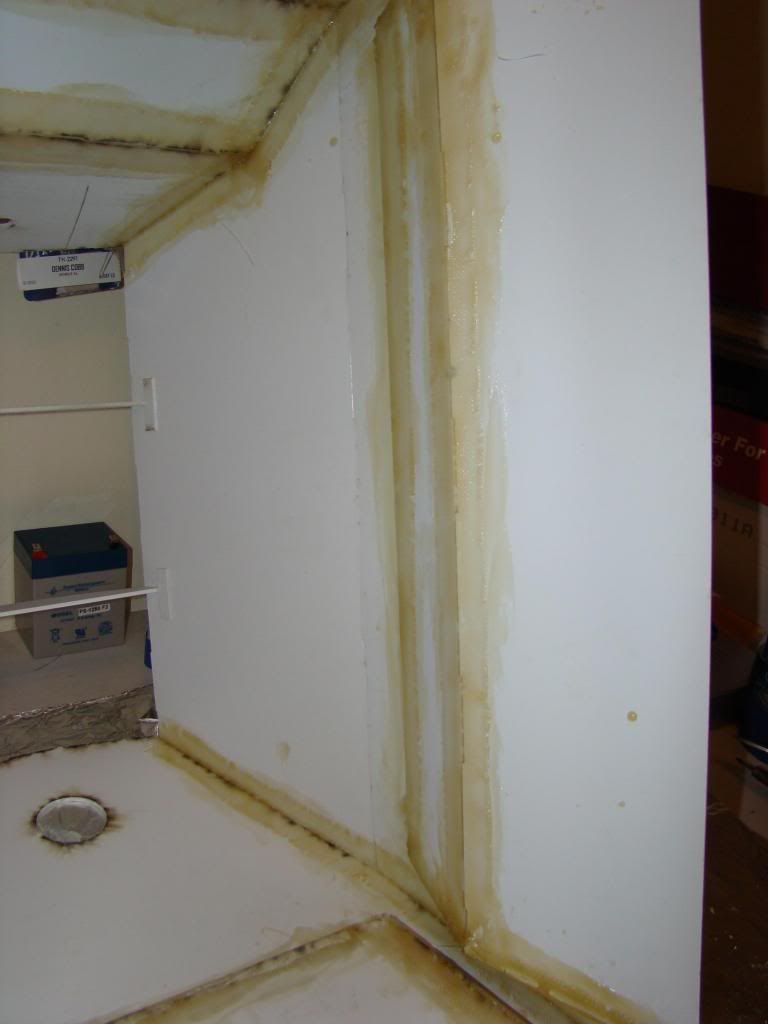
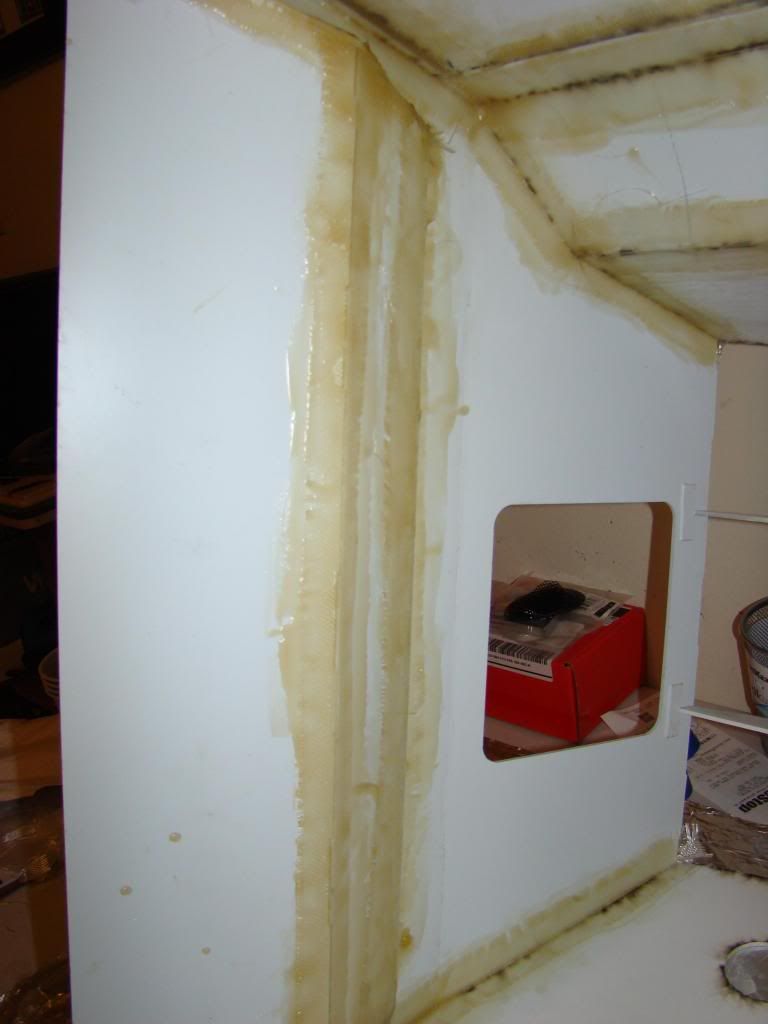
And several shots of finished seams:
I'll say, it's not a very pretty job, and it was pretty darn messy. I'm pretty confident that my weak seams issue will be solved with this. I just wonder what that's going to get in the way of at a later date. I know I can drill through it for mounting thing like the handles and the neck and tail mounts, so I'm hoping the answer to that question is not too much.
Maybe later this evening I'll get some of the work I'd planned on doing before the damage occurred. Only 2 days lost...at least there's not currently a deadline. Yet. :)
A quart of fiberglass resin and a pack of fiberglass cloth. And a couple of paint stirrers, and the most important thing of all, blue nitrile gloves. The gloves were an afterthought. I had no idea just how sticky this afternoon was going to be, so I'm really glad I picked them up.
Start off with a pic of the resin:
I used the plastic solo cups because I already had them in hand. I had no idea that when the resin finally kicks (chemically sets) it gets hot enough to melt the cup.
Here's my test cup. I used a measuring cup to add 4oz of water to the cup, then marked the level. I also marked 8oz, just in case 4 wasn't enough.
Doing that allowed me to know how much resin I was adding to the cup, so I would know how many drops of liquid hardener to add. The can says "for small repairs, add 10 drops to 1 ounce" and "working time will be 10-12 minutes".
For my first cup I added 4oz of resin and 36 drops of hardener. That didn't give me time enough to use about half of the resin.
For the remaining cups I used more along the lines of 7 drops per ounce, which did give me time to use most of the resin.
Here's a shot of several pieces of cloth cut to length for the seams.
And several shots of finished seams:
I'll say, it's not a very pretty job, and it was pretty darn messy. I'm pretty confident that my weak seams issue will be solved with this. I just wonder what that's going to get in the way of at a later date. I know I can drill through it for mounting thing like the handles and the neck and tail mounts, so I'm hoping the answer to that question is not too much.
Maybe later this evening I'll get some of the work I'd planned on doing before the damage occurred. Only 2 days lost...at least there's not currently a deadline. Yet. :)
Thursday, April 24, 2014
Eye pics and TRAGEDY!!
Well, here's a couple of pics of starting to assemble the eyes. As I noted on The K9 Builders club forums, the A&A kit comes with both the 4 slat and the 5 slat eye patterns.
Here's a pic of setting up the eye pieces:
I haven't decided which of the two types I want to use. I had planned on building them both, then choosing at a later date, but last night (luckily before I finished them) I realized that if I build both sets, I won't have any red material left for the control panel. That's OK, I haven't done anything that can't be undone yet.
Now, for the tragedy...late last night I came around the corner into my computer room where I'm building K9, and I kicked the $%^& out of K9's body. It wasn't where it belonged, it was sitting on the floor by the wall, because I needed the table space to work on other parts.
Everywhere you see blue tape is a seam I had to reglue.
I've still got to reglue the side panel, hopefully I'll be able to get that done tonight.
I was already planning to reinforce most of the inside of the seams this weekend somehow, now I see that it's going to be a necessity. I'm thinking fiberglass resin and tape. Hopefully there'll be some nice pics of that before the weekend is over...
Here's a pic of setting up the eye pieces:
I haven't decided which of the two types I want to use. I had planned on building them both, then choosing at a later date, but last night (luckily before I finished them) I realized that if I build both sets, I won't have any red material left for the control panel. That's OK, I haven't done anything that can't be undone yet.
Now, for the tragedy...late last night I came around the corner into my computer room where I'm building K9, and I kicked the $%^& out of K9's body. It wasn't where it belonged, it was sitting on the floor by the wall, because I needed the table space to work on other parts.
Everywhere you see blue tape is a seam I had to reglue.
I've still got to reglue the side panel, hopefully I'll be able to get that done tonight.
I was already planning to reinforce most of the inside of the seams this weekend somehow, now I see that it's going to be a necessity. I'm thinking fiberglass resin and tape. Hopefully there'll be some nice pics of that before the weekend is over...
Tuesday, April 22, 2014
Hot Glue issue
FYI, the hot glue wasn't really easy to remove from the second set of ear screens. Spent a couple of hours doing that tonight...
Monday, April 21, 2014
Waiting on Amazon
So apparently , if you order from Amazon using Prime on a Thursday, and get the free 2nd day shipping option, and then try to have your delivery sent to a business that's closed on Saturday, you won't get your stuff until Tuesday :(
No worries though, some things came in today, and other things will be coming in almost every day for the rest of the week.
While I'm waiting, I decided to work on the ears some.
I started out with a 3"x2" oval created in Paint. Printed it out, cut it out and hot glued it to my metal mesh desktop organizer thing.
Then I cut them out using my dremel with a cutting wheel.
Only thing is...I didn't actually measure the paper templates after printing them, so instead of a 3"x2" oval, I wound up with something about 2 5/8" x 1 3/4".
So, back to the drawing board, or actually Paint. This time I made the oval 3.5" x 2.5", and when printed, it came out about 3.25"x 2.25". This looks much better when compared to the first ones:
Only thing is, this time the hot glue is being a pain to remove.
Oh, and I added some reinforcements to the inner top half of the control panel:
That's all for today...
No worries though, some things came in today, and other things will be coming in almost every day for the rest of the week.
While I'm waiting, I decided to work on the ears some.
I started out with a 3"x2" oval created in Paint. Printed it out, cut it out and hot glued it to my metal mesh desktop organizer thing.
Then I cut them out using my dremel with a cutting wheel.
Only thing is...I didn't actually measure the paper templates after printing them, so instead of a 3"x2" oval, I wound up with something about 2 5/8" x 1 3/4".
So, back to the drawing board, or actually Paint. This time I made the oval 3.5" x 2.5", and when printed, it came out about 3.25"x 2.25". This looks much better when compared to the first ones:
Only thing is, this time the hot glue is being a pain to remove.
Oh, and I added some reinforcements to the inner top half of the control panel:
That's all for today...
Friday, April 18, 2014
Shopping lists
Ok, since I've been working a little faster than I probably should have gluing all the plastic, I decided to let it cure for a couple of days, and work on my list of electronics parts.
I've got several 'extra' 12V batteries, some in particular that R2 can't use due to the shape that'll be repurposed here.
I can cross the RigRunner power distribution off the list, since I had an "extra" left over from when I changed R2's system over from Spektrum to PS2 wireless. It also has 2 USB ports that will power the Arduino and the MP3 trigger.
Speaking of those two pieces, about 3 weeks ago, SparkFun Electronics had "Arduino day" on a Saturday, all their boards were on sale 40% off. I picked up 2 Arduino UNOs and their MP3 trigger board.
I hit Amazon in a big way yesterday, and picked up a bunch of the parts I'm going to need. that list included:
I also ordered a SaberTooth 2x25 speed controller from Dimension Engineering, having used that one in R2. Their customer service is top notch. They are very friendly and easy to work with, in the event that you ever have to contact them.
All of that stuff should be showing up next week, so I'll have plenty of new toys to play with.
Today I went shopping at the hobby store and the office supply store, and picked up the stuff to make ears with. Brass tubing, pencil cup, that kind of thing. Also picked up some 2mm styrene sheets, since the A&A kit doesn't come with much scrap for improvising.
My outstanding list for electronics is currently:
That was one advantage of the Spektrum park flyer style setup. All you had to do was plug the wires into the right places, make sure black and red weren't mixed up and you were ready to go.
The PS2 setup is much easier to hide though, since it's the one small controller. It's way more fun to be anonymous and let everyone wonder who's driving, or even better let them think it's autonomous :)
Tomorrow I'll check GameStop for the controller, hopefully they'll have one and it'll be on sale since it's old tech :)
That's all for now...see you next update!
I've got several 'extra' 12V batteries, some in particular that R2 can't use due to the shape that'll be repurposed here.
I can cross the RigRunner power distribution off the list, since I had an "extra" left over from when I changed R2's system over from Spektrum to PS2 wireless. It also has 2 USB ports that will power the Arduino and the MP3 trigger.
Speaking of those two pieces, about 3 weeks ago, SparkFun Electronics had "Arduino day" on a Saturday, all their boards were on sale 40% off. I picked up 2 Arduino UNOs and their MP3 trigger board.
I hit Amazon in a big way yesterday, and picked up a bunch of the parts I'm going to need. that list included:
- 1 right angle USB cable to use powering the Arduino
- 1 Futaba S148 servo for the ears
- 1 linear conversion kit for the Futaba servo
- 1 set of servo horns for moving the ears
- 1 set of servo linkage rods for connecting the servo to the servo horns
- 3 12v-6v stepdown converters for powering the servos from the RigRunner
- 1 2-channel 5V relay module for powering the antenna that will be the scanner
- 1 12V auto audio amplifier for the sound
- 1 set of 3.5" speakers for sound (what else would they be for?)
- 1 PS2 controller extension cable for splitting out the signal from the wireless receiver to the Arduino
I also ordered a SaberTooth 2x25 speed controller from Dimension Engineering, having used that one in R2. Their customer service is top notch. They are very friendly and easy to work with, in the event that you ever have to contact them.
All of that stuff should be showing up next week, so I'll have plenty of new toys to play with.
Today I went shopping at the hobby store and the office supply store, and picked up the stuff to make ears with. Brass tubing, pencil cup, that kind of thing. Also picked up some 2mm styrene sheets, since the A&A kit doesn't come with much scrap for improvising.
My outstanding list for electronics is currently:
- control panel light system
- drive motors, wheels, belts, axles and such
- servos for the head and tail
- PS2 wireless controller/receiver
That was one advantage of the Spektrum park flyer style setup. All you had to do was plug the wires into the right places, make sure black and red weren't mixed up and you were ready to go.
The PS2 setup is much easier to hide though, since it's the one small controller. It's way more fun to be anonymous and let everyone wonder who's driving, or even better let them think it's autonomous :)
Tomorrow I'll check GameStop for the controller, hopefully they'll have one and it'll be on sale since it's old tech :)
That's all for now...see you next update!
Wednesday, April 16, 2014
2 updates in 3 days. Things are actually moving pretty well with this build!
So, last night I assembled and glued the upper pieces of the body:
I built and glued the sides first, then the back, since it had the angles and such.
As you can see, I used some packing tape in several places where strength was needed to pull some of the pieces together. That's the tape I used when I was "stretching" R2's aluminum skins around his frame. It doesn't tear, and doesn't let go by itself.
I also hit Lowe's today and bought some aluminum angle pieces. A couple of 1/16" 1/2"x3' angle pieces for the bottom side supports, which I saw another builder do, to keep the bottom of the body from flexing too much, a 1/16" 1"x3' for inside support to attach the handles to, and for neck tube support. I also picked up a 1/16" 1" square tube for the neck and some other inner support, as yet to be determined.
And, if that weren't enough, I picked up a couple of drawer pulls that look a lot like the ones in the reference photos I've been checking out. Only problem with them is that they are chrome and not brushed stainless. I'll probably look around at a couple more hardware stores before I actually use them.
This evening I decided to add some curved ribs across the top of the body, to support the top, and to assist with curving the top piece, again like I've seen another builder do.
Started off with some ABS donated by R2, from his old A&A feet. At the top is the paper template I cut out for the curve.
And, after using the belt sander, which hasn't seen much use in several years:
And here's the "blocks" that the ribs will sit on, to add support and make it easier to glue:
I used small spring clamps to set the blocks, but was afraid that, being plastic, they'd wind up glued in there as well, so I removed them after a couple of minutes.
After a couple of hours, I decided it was time to add the ribs:
And, that's all the photos for today.
Been doing some thinking about how much movement I want K9 to have, besides driving around and head up and down. I've checked out the schematic for making a moving tail and another builder's diary, and I never even considered some of the things his build can already do. Guess I need to start learning how to drive servos with my arduinos...
I built and glued the sides first, then the back, since it had the angles and such.
As you can see, I used some packing tape in several places where strength was needed to pull some of the pieces together. That's the tape I used when I was "stretching" R2's aluminum skins around his frame. It doesn't tear, and doesn't let go by itself.
I also hit Lowe's today and bought some aluminum angle pieces. A couple of 1/16" 1/2"x3' angle pieces for the bottom side supports, which I saw another builder do, to keep the bottom of the body from flexing too much, a 1/16" 1"x3' for inside support to attach the handles to, and for neck tube support. I also picked up a 1/16" 1" square tube for the neck and some other inner support, as yet to be determined.
And, if that weren't enough, I picked up a couple of drawer pulls that look a lot like the ones in the reference photos I've been checking out. Only problem with them is that they are chrome and not brushed stainless. I'll probably look around at a couple more hardware stores before I actually use them.
This evening I decided to add some curved ribs across the top of the body, to support the top, and to assist with curving the top piece, again like I've seen another builder do.
Started off with some ABS donated by R2, from his old A&A feet. At the top is the paper template I cut out for the curve.
And, after using the belt sander, which hasn't seen much use in several years:
And here's the "blocks" that the ribs will sit on, to add support and make it easier to glue:
I used small spring clamps to set the blocks, but was afraid that, being plastic, they'd wind up glued in there as well, so I removed them after a couple of minutes.
After a couple of hours, I decided it was time to add the ribs:
And, that's all the photos for today.
Been doing some thinking about how much movement I want K9 to have, besides driving around and head up and down. I've checked out the schematic for making a moving tail and another builder's diary, and I never even considered some of the things his build can already do. Guess I need to start learning how to drive servos with my arduinos...
Subscribe to:
Posts (Atom)